Best Ways to Import CAD Files to Revit
- 3 min read
- September 12, 2022
Have you been struggling to convert CAD files to Revit? As a Revit user for more than a decade, I have also gone through it multiple times. Over the years, I have tested out several techniques to convert a CAD file to Revit, and here are some of them:
- Import CAD (not what I’d recommend)
- Link CAD (highly recommended)
- Buy third-party software (can be expensive)
- Let an outsourcing partner do it for you e.g. MGS Global Group (makes sense if you have high volume or plan to fully transition to Revit)
All of the above options will work, however, I’m recommending the easiest one for me. I used the second option ‘Link CAD’. Please note the CAD file can be linked at any time and I only used Revit for detailing.
Below are the steps I used to do the conversion and they are applicable for Revit 2022.
STEP 1: Link a CAD file in Revit


Note: AutoCAD file preparations are important prior to linking the file. Make sure that the AutoCAD file is layered properly and the model is located near the Origin, not an arbitrary location.
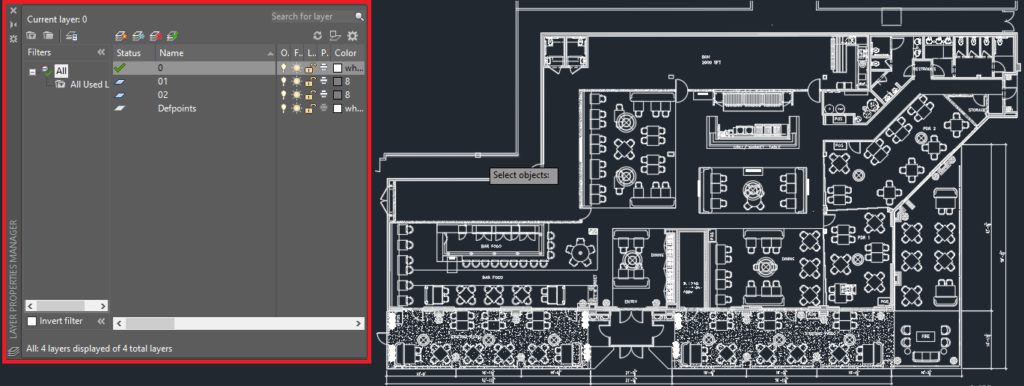
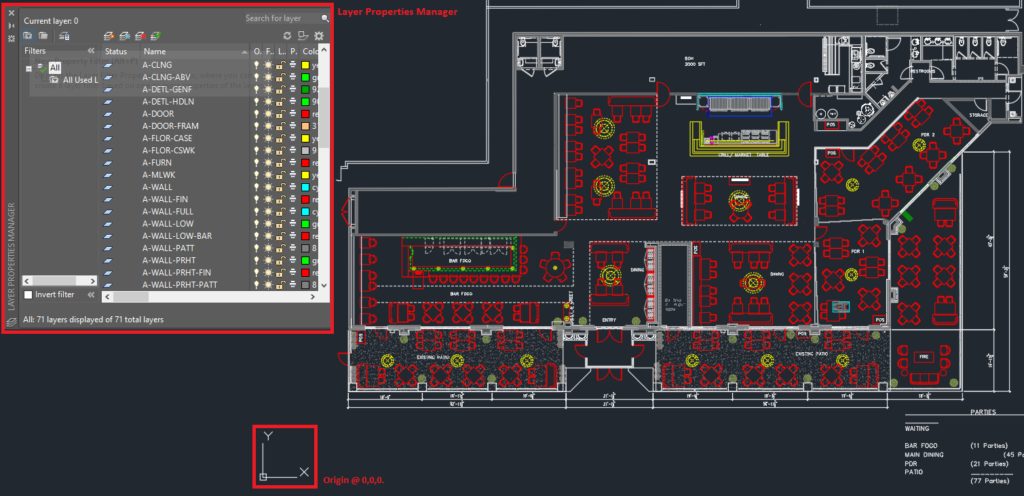
Proper layering is important because this will be useful in manipulating the model in Revit.
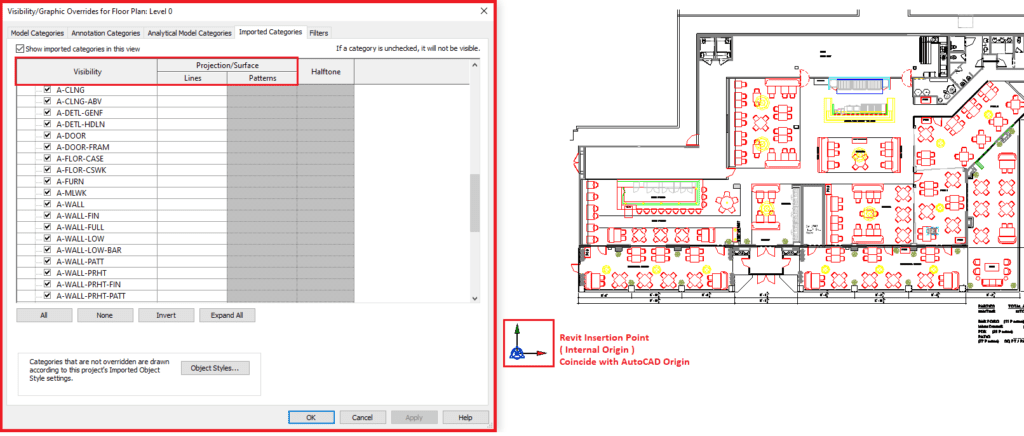
The model on the other hand is to be located near the Origin to ensure proper insertion and to avoid graphical issues in the future. Geometry in the file .dwg with extents greater than 20 miles (33km) may reduce reliability and result in undesirable graphic behavior.
Figure 1: AutoCAD file default layer (before layering)

Figure 2: AutoCAD sample file with proper layering. Model located near the Origin (after layering).

Figure 3: Revit Visibility Option and Internal Origin.

Step 2: Pinning the CAD File
After inserting the file, it is a good practice to pin the CAD file.
- Select the CAD file.
- Go to Modify panel > Modify > select Pin tool.
- Alternatively, use “PN” as a keyboard shortcut.
- The CAD file is now pinned.
- Click Esc to end the Pin tool

Step 3: Manage the CAD File
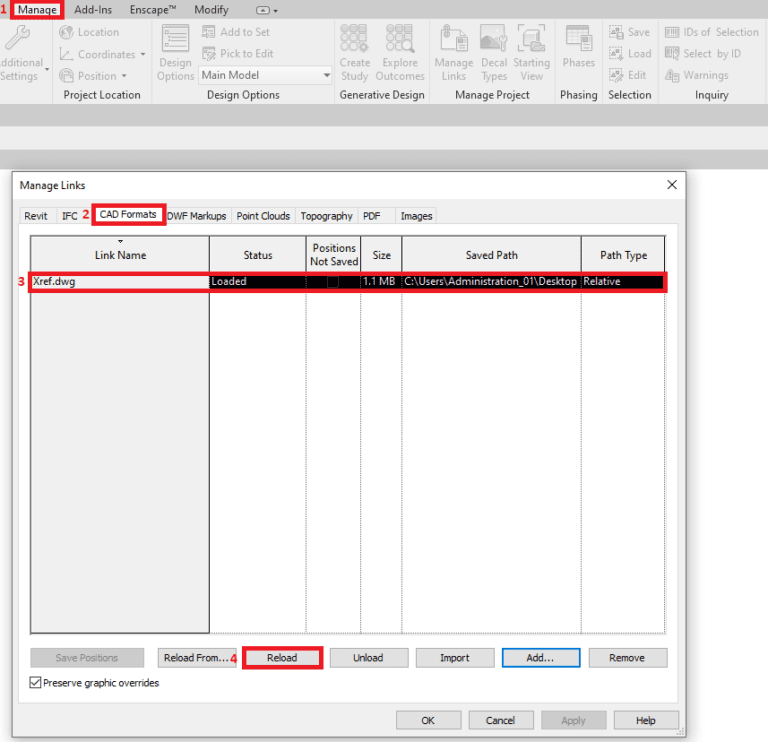
To manage the link CAD file you may open Manage Links.
- Go to Insert tab > Link panel > Manage Links > Manage Links dialog box will appear.
- Go to the CAD formats tab.
- The linked CAD file will be listed here. Select the row of the linked CAD file.
- Click Reload to reload the file from the same path.
- Use the “Reload From” option if the path of the file is changed.
- If you would like to unload the file from your project, choose Unload. You can at a later stage, use Reload to reload it in your project.
- If you would like to completely remove the file from your project, choose Remove. You cannot Reload the linked CAD file, if you have removed it. You will need to link the file again.
Manage Links Panel

Was this helpful? Give a thumbs up or post a comment.
For more blogs on Revit, check out https://mgsglobalgroup.com/blog/.
MGS Global Group is here to help if you require any more assistance. Get in touch with us for all your drafting needs.
Connect with us!


