Hacks for Customizing Grids on Revit
- 2 min read
- November 14, 2022
Revit’s sharing and updating capabilities are unlike any other BIM software in today’s AEC market. Revit is based on the idea of creating an entire model within a single file that contains all the architecture elements regardless of its size.
A single file can contain all the views of the 3D model that the user will create and automatically produce its floor plans, ceiling plans, sections, elevations and schedules. Revit 2022 includes Revit Structure (for structural engineers) and Revit MEP (for mechanical, electrical, and plumbing engineers).
Customizing Grid Appearances
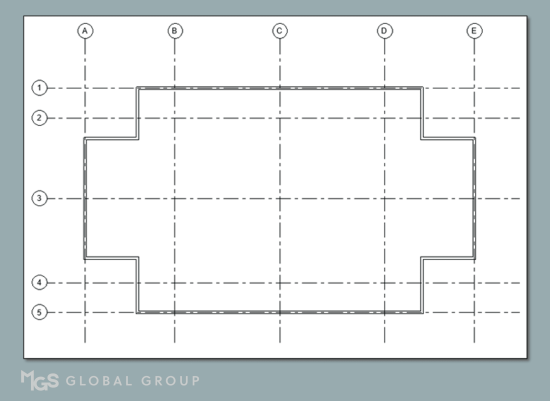
Grid lines are elements that have both instance & type properties. The grid lines in ‘Floor Plans’ and ‘Elevation Views’ are customizable so that the ‘Grid Name Symbol’ can be visible at both ends of the grid. When starting a ‘Grid Line’ command, the default appearance is shown below with one grid symbol being shown at the end of each line.
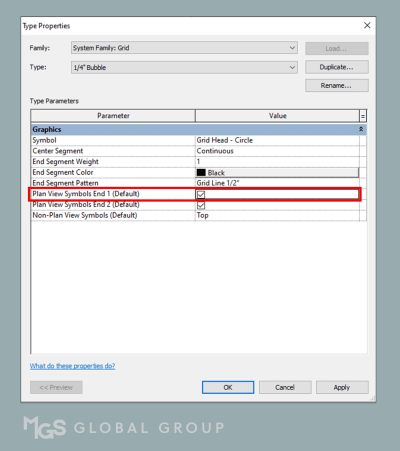
1. Select a grid, go to ‘edit type’ from properties, click the ‘Plan View Symbols End 1 (Default)’ and close the window by clicking ‘OK’.
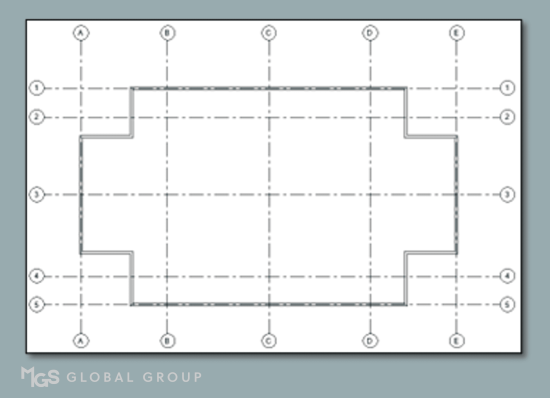
2. Grid symbols will then appear on both ends of the grids.
Removing the Center Segment of a Grid Layout
Despite the practicality of grid lines, there are instances where they’ll obstruct certain information within a drawing. For a simpler and sleeker drawing, users can remove the grid line that goes through the length of a plan and place them outside the building or external walls.
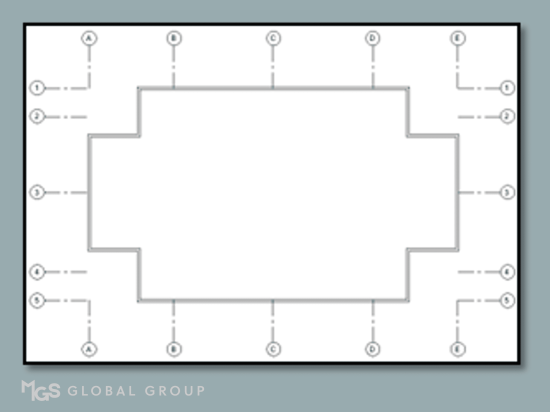
1. Go to ‘Grid type properties’ and select ‘none’ under the Center Segment Parameter.
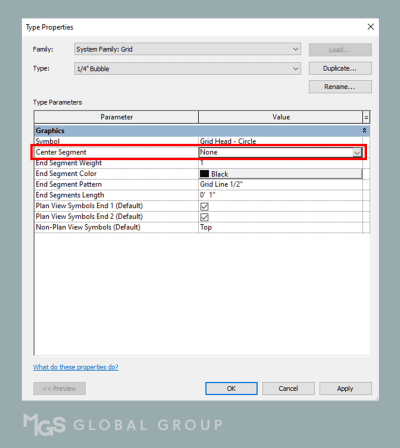
2. As seen in the grid layout below, the center segment of grids are no longer shown.
Was this insightful? Give a thumbs up or post a comment.
For more of our blogs, check out https://mgsglobalgroup.com/blog/.

Connect with us!


