Revit Wall Sweeps: Family-Profile vs In-Place Creation
- 5 min read
- April 27, 2023
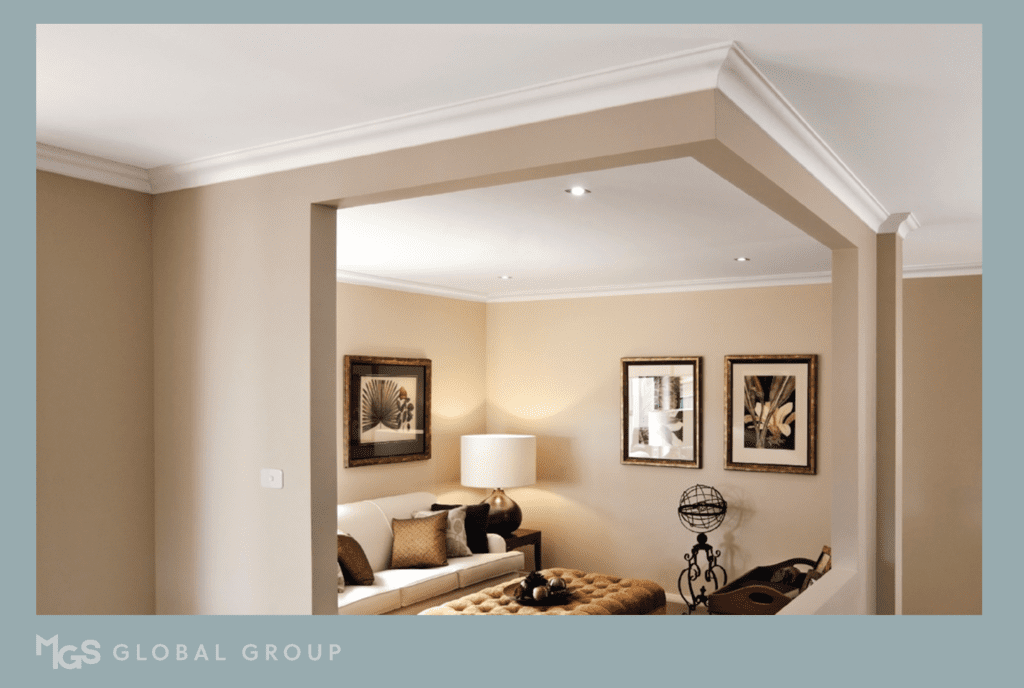
Interior design plays a crucial role in construction, as it enhances the aesthetic appeal of a space or room. One important component of interior design is the use of cornices for ceilings and baseboards for wall-based elements. By using Revit, you can create these components to make your BIM model more detailed and visually appealing.
There are two ways to create cornices and baseboards in Revit: the Family-Profile Creation process and the Model-In-Place Creation process. Here are the steps:
Family-Profile Creation:
1. Start by creating a new profile that is either metric or imperial and designated as “profile hosted” since cornices and baseboards are typically hosted on the wall.
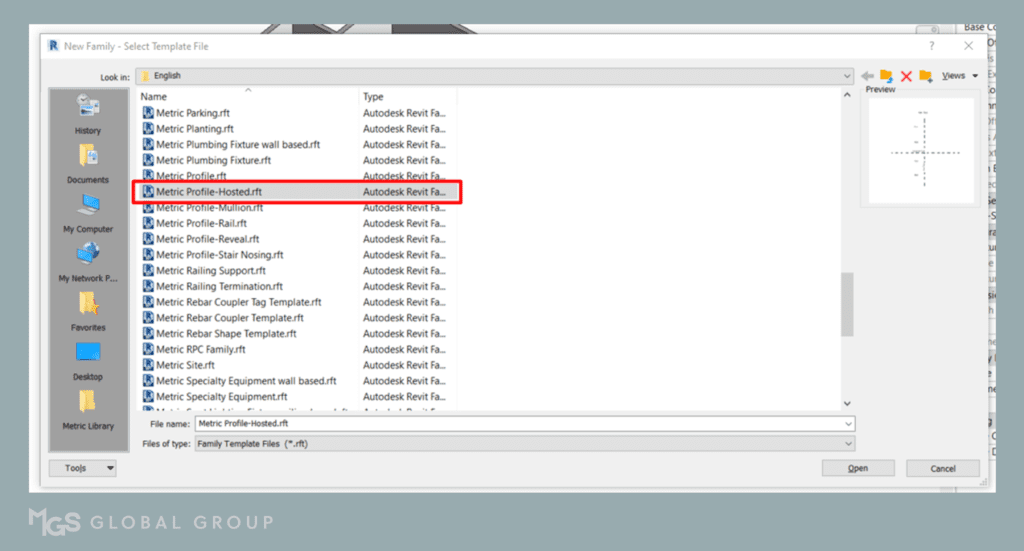
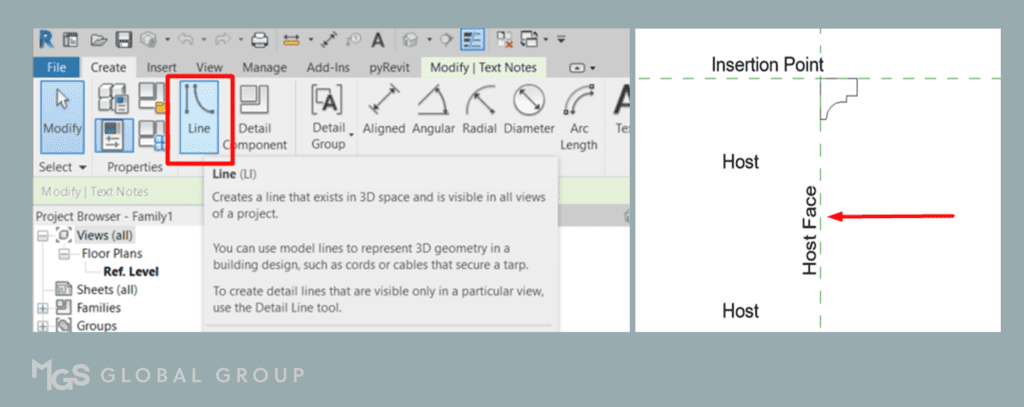
2. Once you have selected your template, look for the designated labels for the host, host face, and insertion point. Draw your desired profile with the proper dimensions and sizes using the line icon under the “create” tab.
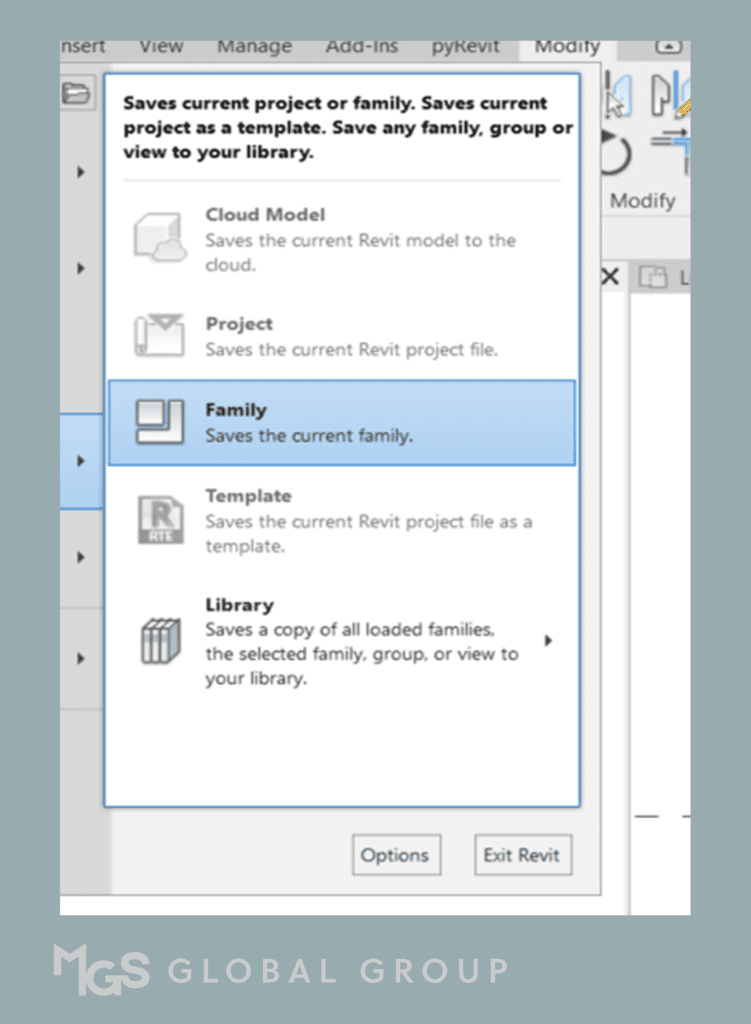
3. Save your new wall sweep as a family and name it according to your preference. Then, load it into your project.
4. After loading, access and create new sweep types in the wall tab and select your new profile in the properties.
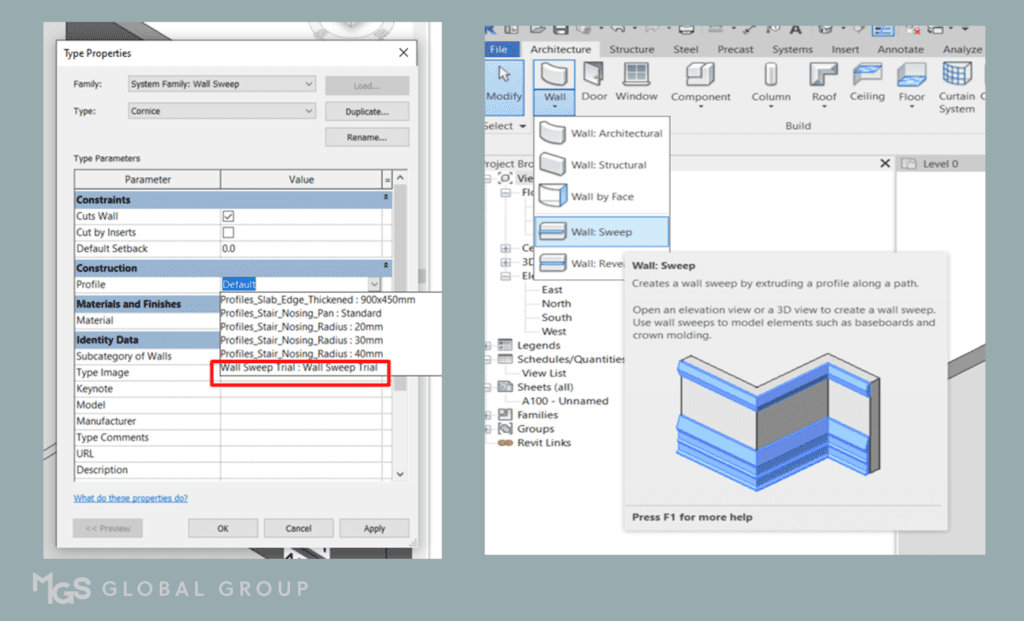
5. Designate and apply the wall sweep onto the wall and choose the materials you want to use.
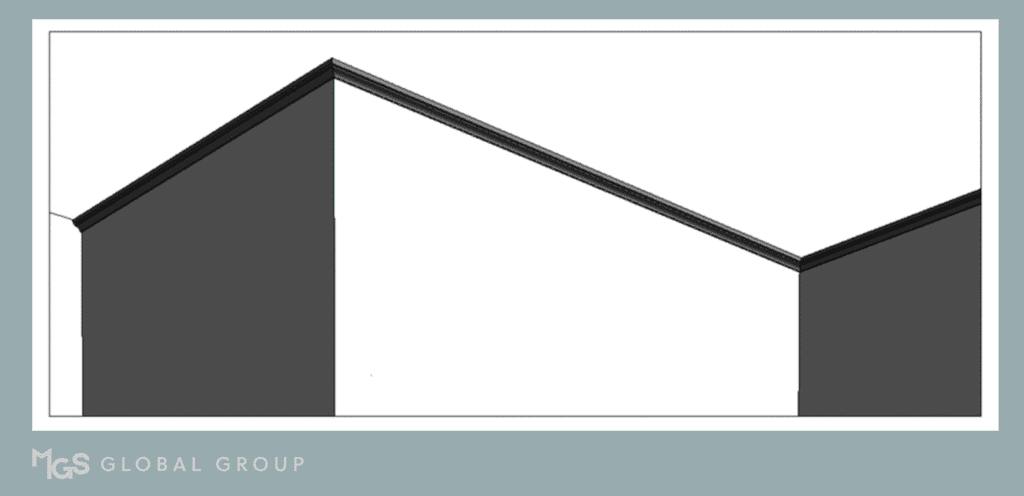
Model-In-Place Creation:
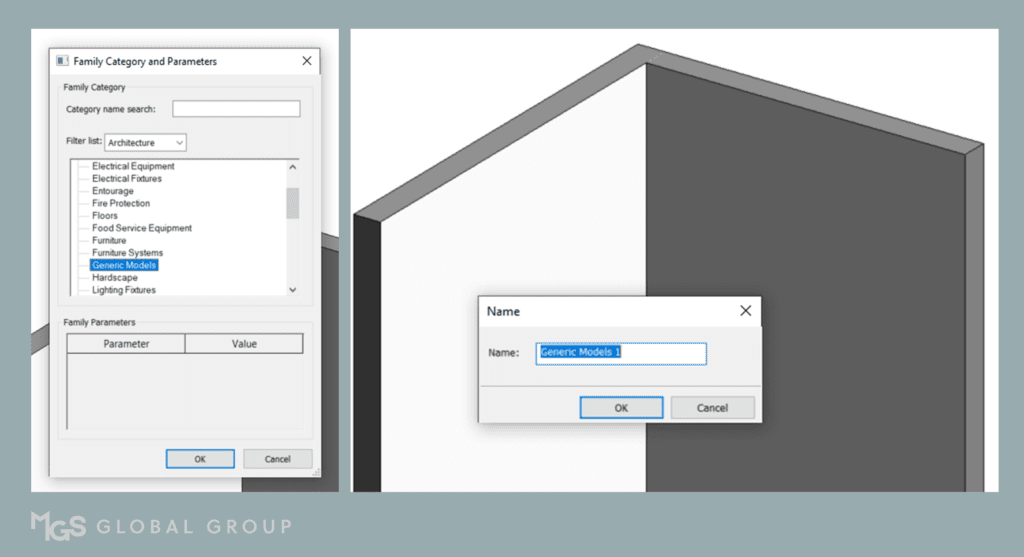
1. Identify the category of the new component you are going to make, and rename it accordingly.
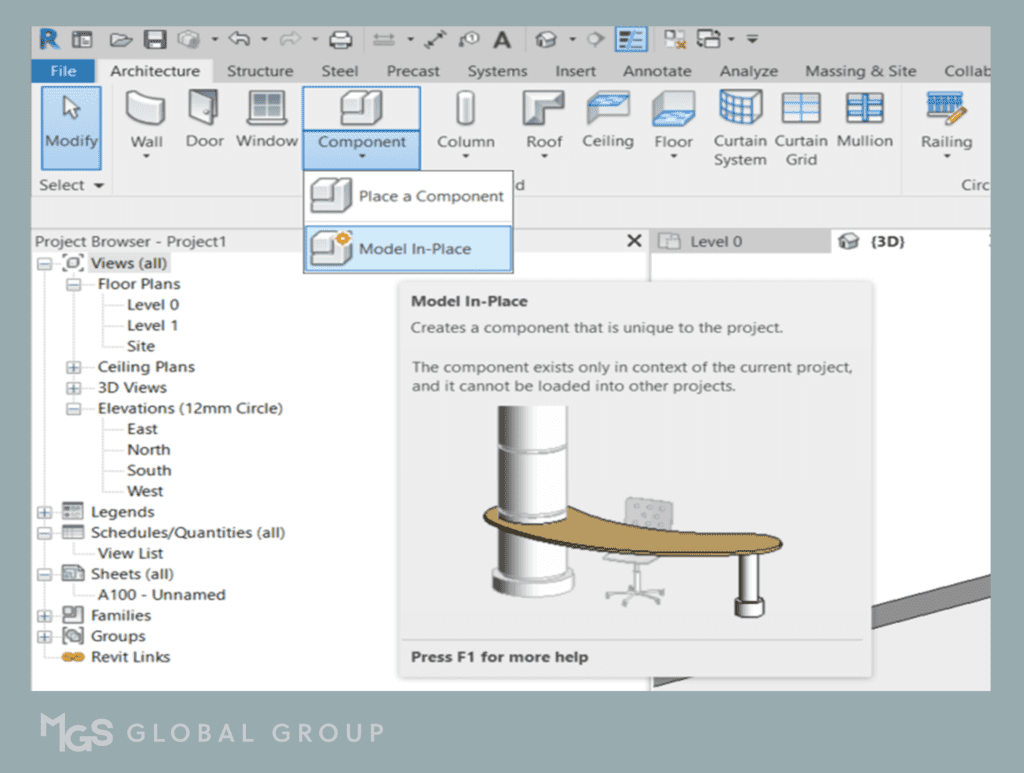
2. Before proceeding with creating the built-in sweep, it is important to first identify its category, which could be either a generic model or a wall. Once identified, rename the new component that you will be creating accordingly.
3. Access the “create” tab and select “sweep“. Choose the path to assign the orientation of the sweep. An identified face section will appear to allow you to draw your sweep profile.
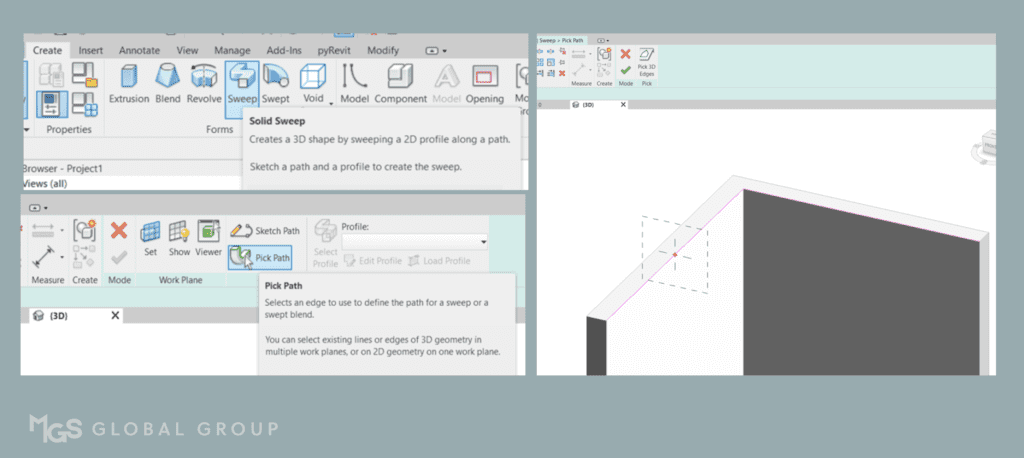
4. Edit the profile by designating its dimensions and sizes. Check the finished cornice and confirm all changes made in the process by clicking on the (√) button.
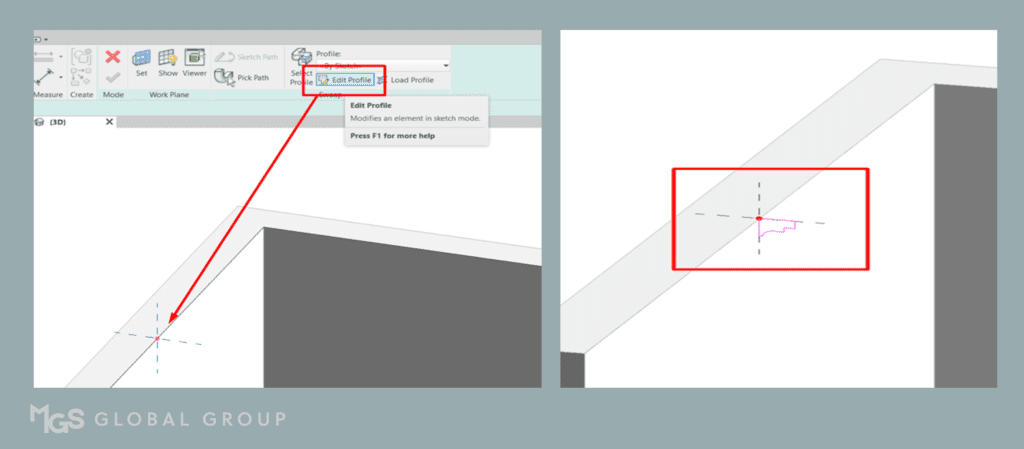
5. Apply materials to the profile to achieve the desired finish.

By following these steps, you can create stunning cornices and baseboards that will enhance the look and feel of your interior design project in Revit.
Comparison between the Two Process
Family-Profile Creation
- Provides an editable profile that can be customized to the desired dimensions and sizes;
- Materials can be applied to the profile to achieve the desired finish;
- Profile can be saved as a family and used for future projects, saving time and effort;
- The profile can be designed to cut through door openings and windows, providing a seamless look and functionality;
- Offers a more detailed approach to creating wall sweeps compared to other methods, resulting in a higher level of accuracy and precision.
Model-in-Place Creation
- Offers an editable profile with customizable dimensions and sizes
- Materials can be applied to the profile for the desired finish
- Profile does not cut through door openings and windows, so additional adjustments may be needed
- Profile cannot be saved as a family and cannot be used for future projects, limiting its reusability
- Provides a faster way to create wall sweeps, making it ideal for small rooms and areas.
Ultimately, the choice between the two processes depends on the specific needs of the project. For projects that require a high level of accuracy and precision, the Family-Profile Creation may be the better option. However, for projects that require a faster turnaround time, especially for smaller rooms and areas, the Model-In Place Creation may be more suitable.
Regardless of the method chosen, both provide effective ways to create wall sweeps that can enhance the overall aesthetic appeal of a space.
Was this insightful? Give a thumbs up or post a comment.
For more of our blogs, check out https://mgsglobalgroup.com/blog/.
Connect with us!


