Revit Revealed: Five Overlooked Tools in Revit
- 5 min read
- June 22, 2023
When it comes to architectural design and construction, Revit is undoubtedly a game-changer. However, amidst the multitude of features and tools it offers, some hidden gems often go unnoticed. In this article, we will shine a spotlight on five often overlooked tools in Revit that have the potential to revolutionize your workflow. From enhancing visibility and control to streamlining tasks and enabling advanced automation, these tools are ready to unlock a new level of efficiency and productivity. So, let’s dive in and discover the power of these hidden treasures in Revit.
1. Filter
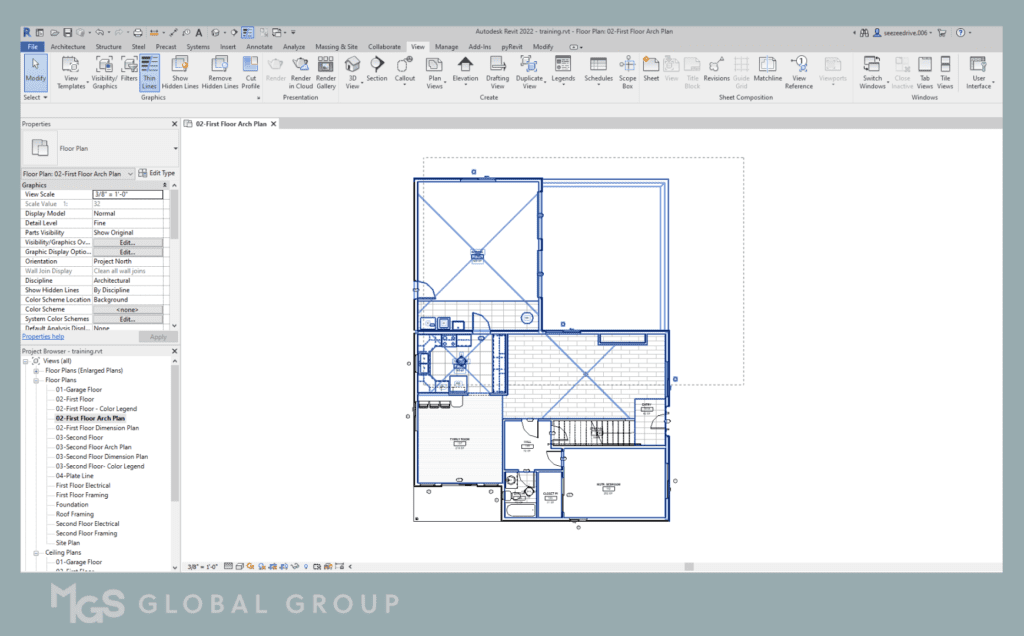
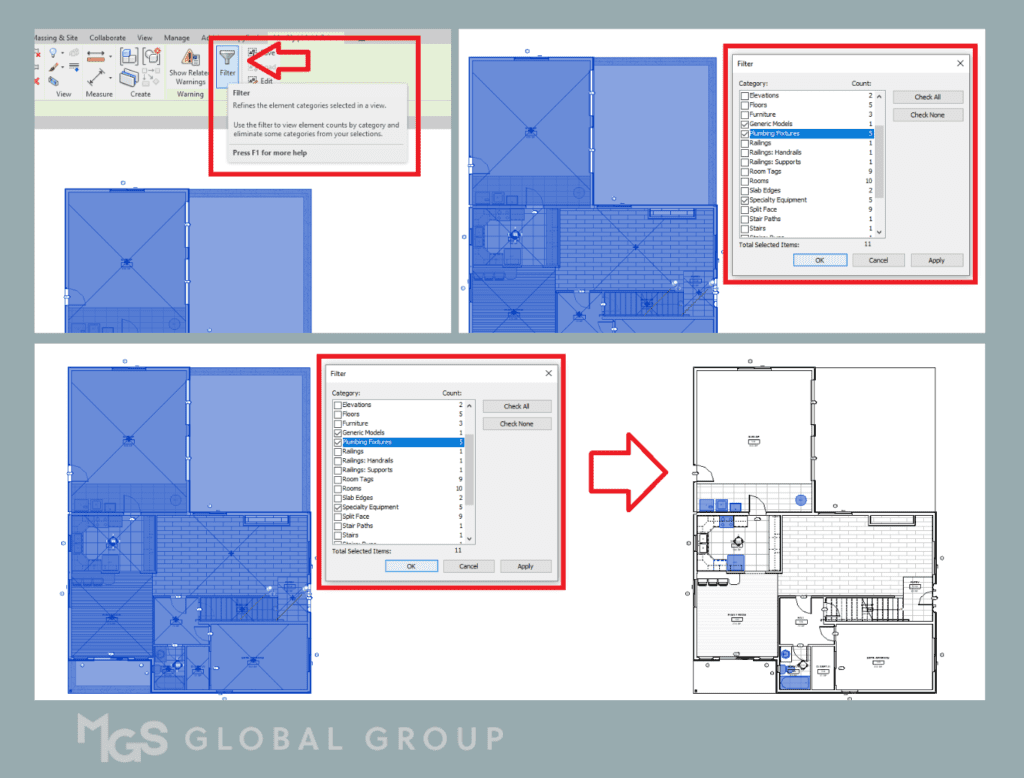
The “Filter” tool in Revit is a valuable feature that improves workflow efficiency. It becomes accessible when you select multiple categories of elements. Using the tools in the Filter panel, you can easily refine your selection by including or excluding specific categories. This tool is especially useful when working with complex models, as it enables you to quickly identify and select elements based on their categories.
To utilize the filter tool, simply select the desired area:
Click the filter icon and a pop up will appear then toggle the checkboxes to filter out the specific categories you intend to select.
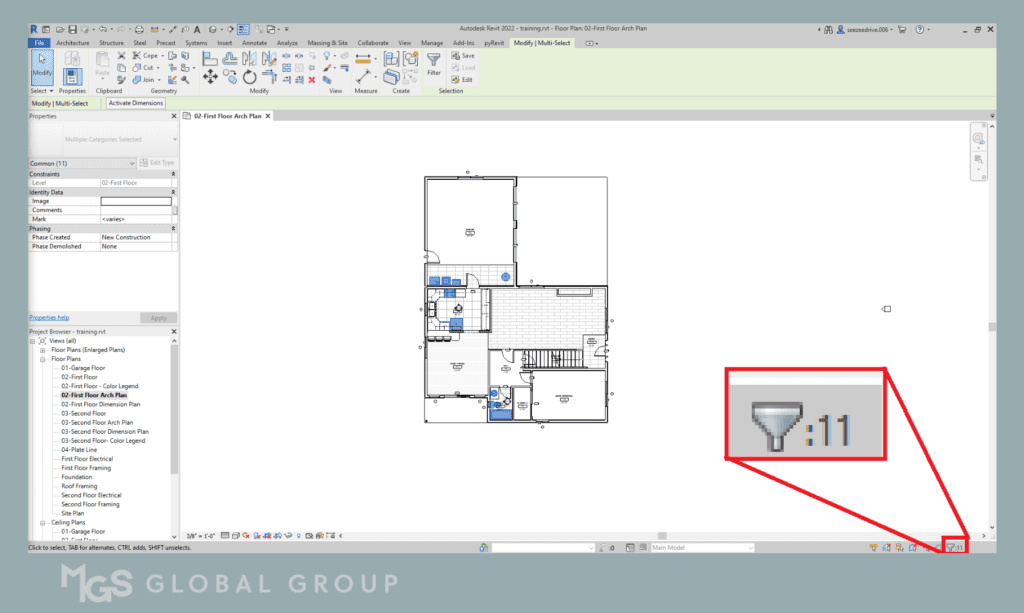
You can also find the Filter tool conveniently located on the Status Bar, where it displays the number of selected or filtered elements.
2. Temporary Hide/Isolate
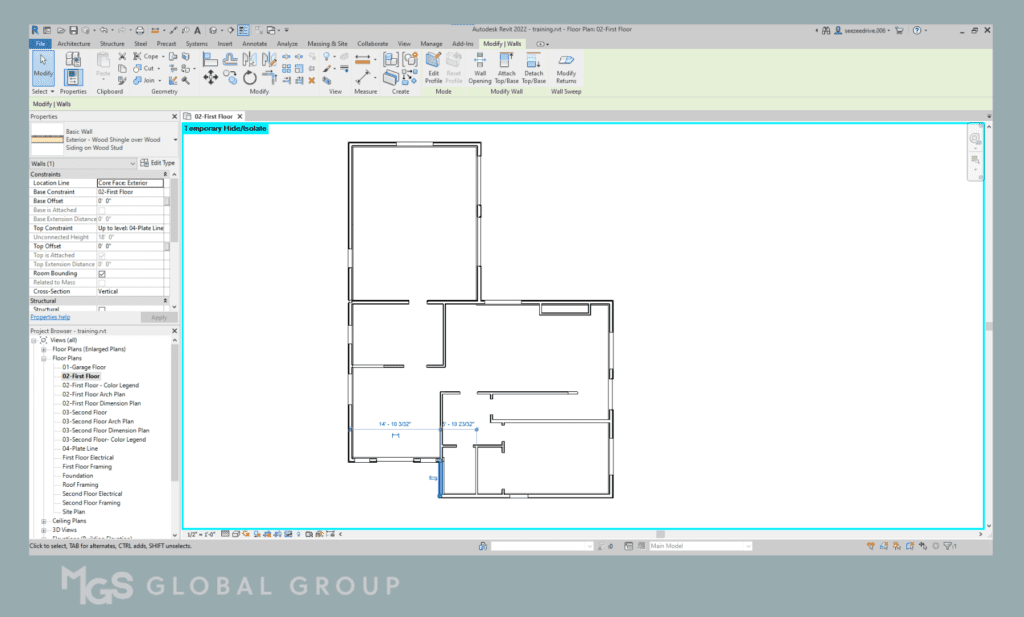
Have you ever found yourself in a cluttered view, struggling to focus on specific elements? The Temporary Hide/Isolate tool can be a lifesaver in such situations. It allows you to temporarily hide or isolate selected elements, giving you a clearer view of the components you need to work with. By isolating objects, you can streamline your editing process, minimize distractions, and gain better control over complex models.
To hide or isolate an element, simply click on the element. Then, on the View Control Bar located at the lower left, click the eyeglass icon and choose the operation you wish to execute. You can either hide/isolate an element, or hide/isolate the entire category.
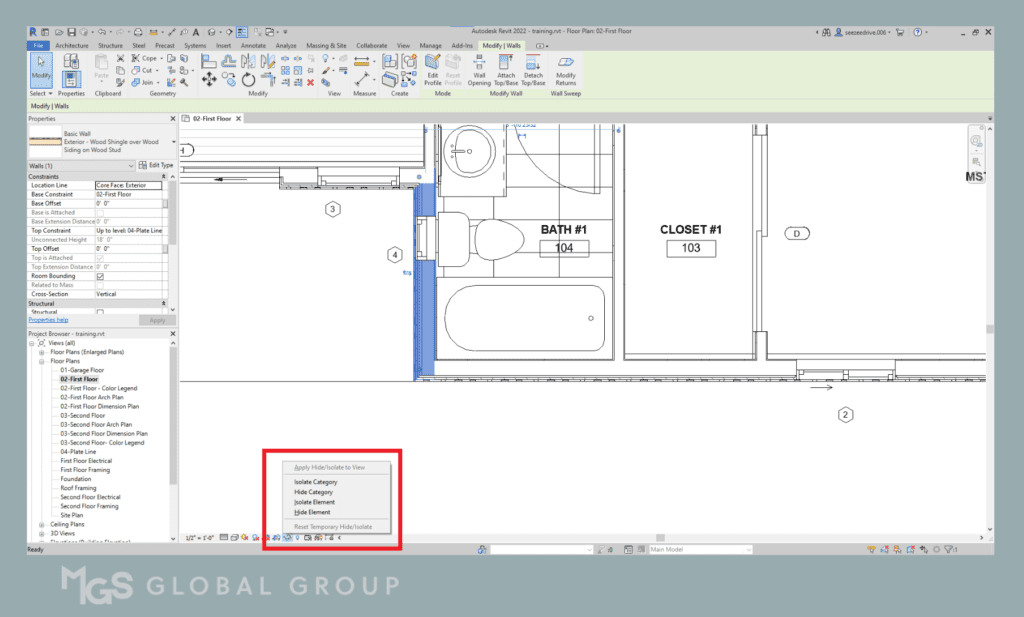
You can also find the Filter tool conveniently located on the Status Bar, where it displays the number of selected or filtered elements.
3. Lock Tool
The Lock Tool allows you to maintain design consistency and prevent accidental modifications in collaborative projects. It allows you to lock selected elements, views, or even entire worksets, ensuring that critical components remain untouched while enabling others to work freely on non-locked elements. By using the Lock Tool strategically, you can maintain design integrity, prevent conflicts, and foster a controlled and efficient collaboration environment.
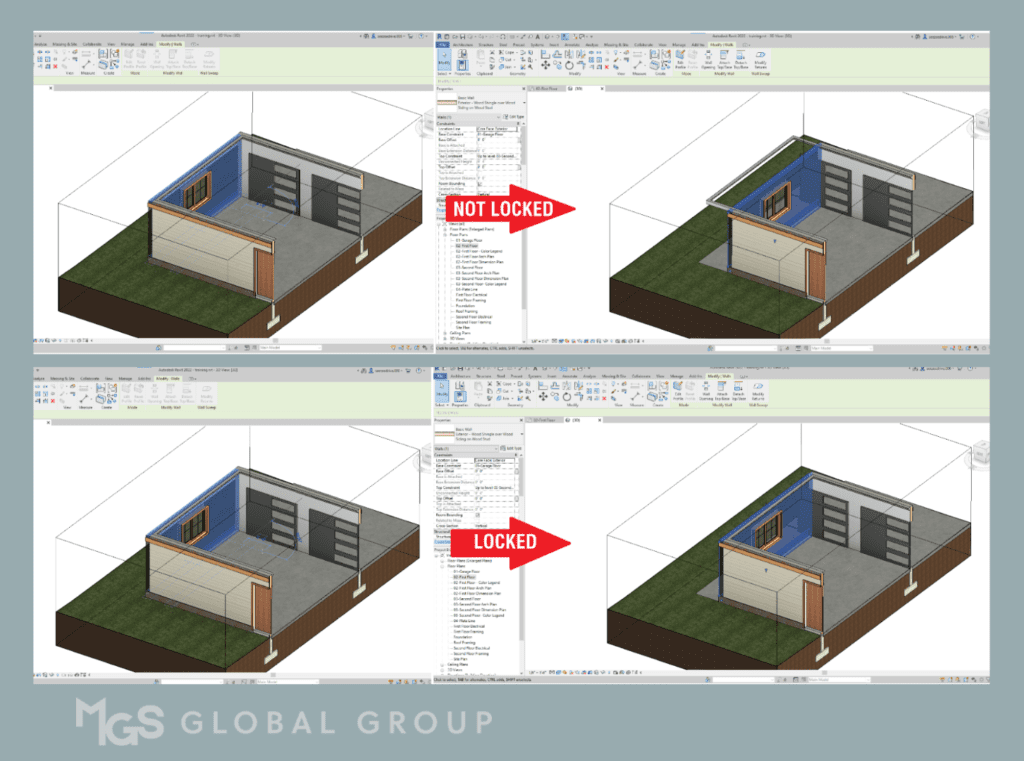
For instance, when creating crown moldings through sweep, it’s a great habit to pick lines and lock them onto walls.
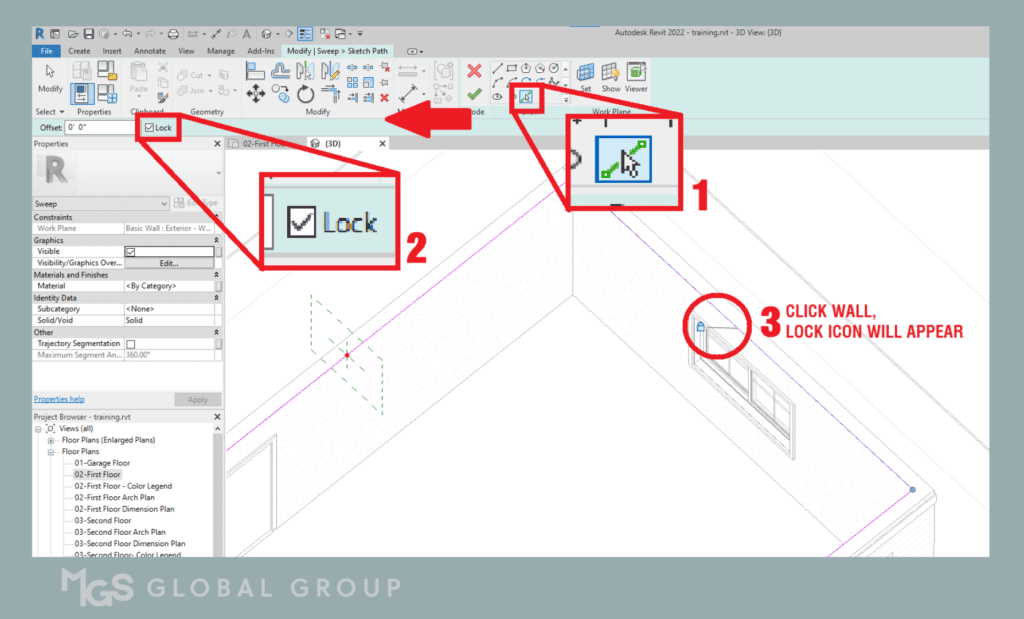
This ensures that whenever you modify or move the wall, the crown molding will also move with it.
4. Plan Region
The Plan Region tool in Revit allows you to adjust the view range of a specific area, providing flexibility and precision when creating detailed plans and emphasizing important details. By tailoring plans according to project requirements, you can present information more effectively and communicate design intent with precision.
To use this tool, navigate to View > Plan Views > Plan Region.
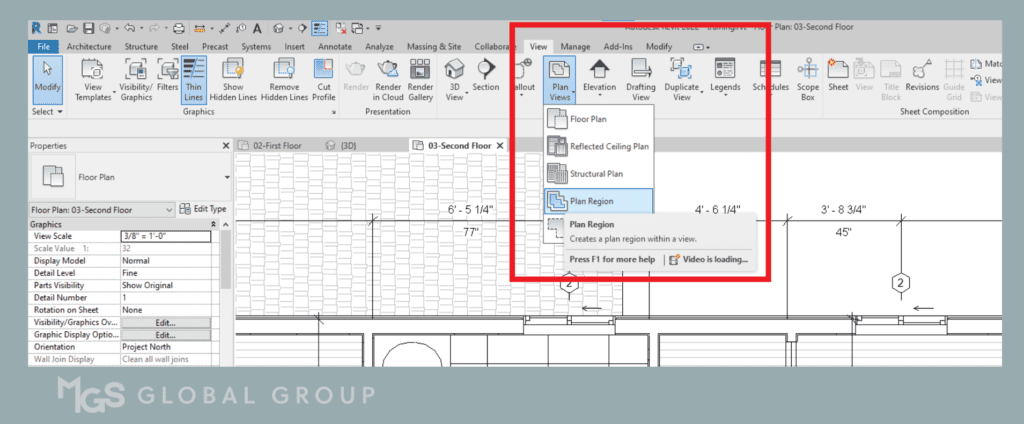
On the Modify tab, create the boundary for the plan region.
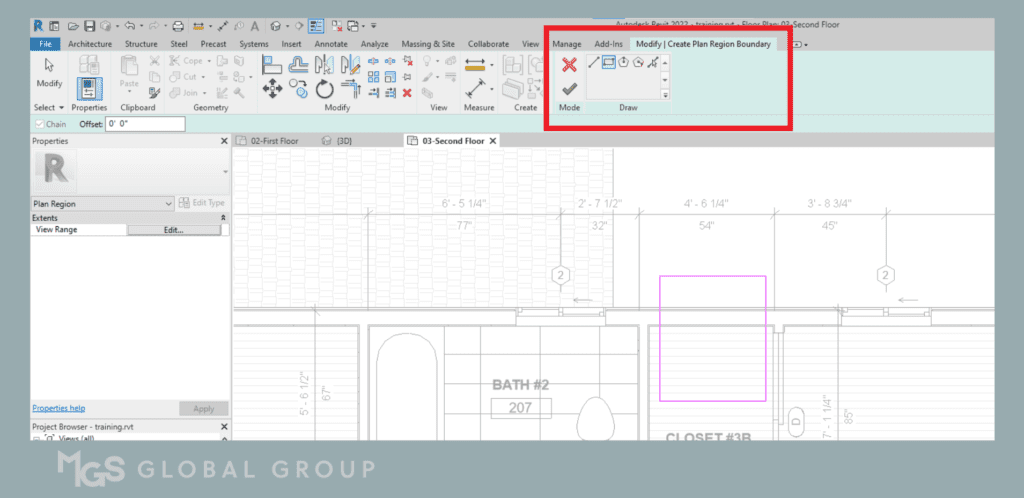
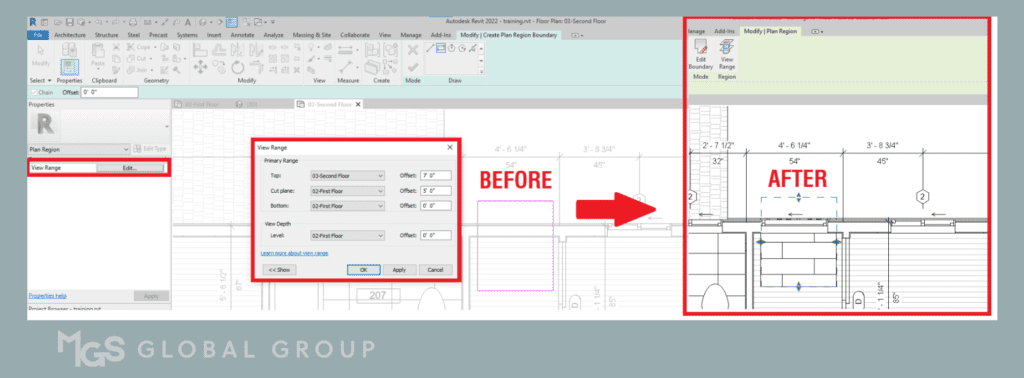
Once the plan region boundary has been created, you can modify the view range. For example purposes only, the view range in this case is set to show the window on the first floor reflected on the second floor.
5. Dynamo
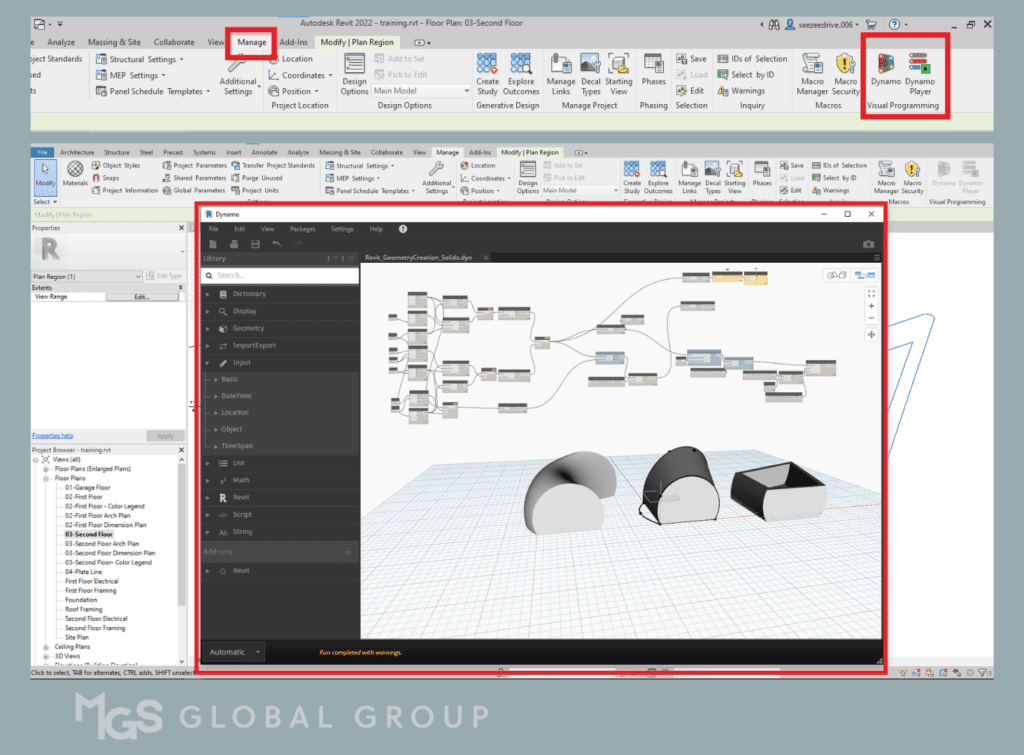
Dynamo, an open-source visual programming tool integrated into Revit, might be the most overlooked gem on this list. With Dynamo, you can automate repetitive tasks, create complex parametric designs, and streamline your workflow through the power of visual scripting. By connecting nodes and defining relationships, you can automate processes, generate geometry, extract data, and perform advanced calculations within Revit. Whether you’re a beginner or an advanced user, exploring Dynamo opens up a world of possibilities for enhanced productivity and design exploration.
To utilize Dynamo, go to Manage tab and furthest to the right you will find the Dynamo icons. This tool is quite tricky but very rewarding when learnt.
As you become more familiar with Revit’s extensive range of tools and features, it’s important not to overlook the hidden gems that can significantly impact your workflow. The five tools we’ve explored offer unique capabilities to enhance visibility, control, collaboration, and automation within your Revit projects. By incorporating these often-overlooked tools into your toolkit, you can unlock their full potential and take your architectural designs to new heights of efficiency and creativity. Embrace the power of Revit’s hidden treasures and revolutionize your workflow today.
Was this insightful? Give a thumbs up or post a comment.
For more of our blogs, check out https://mgsglobalgroup.com/blog/.
Connect with us!


