Three Revit Hidden Features You Should Know About
- 5-7 min read
- June 9, 2025
Revit. The name itself commands respect in the Architecture, Engineering, and Construction (AEC) industry. It’s a powerhouse of a tool, meticulously designed for Building Information Modeling (BIM), enabling professionals to design, document, and deliver building projects with precision.
Many of us use it daily, navigating its robust interface to bring architectural visions to life. Yet, even for seasoned architects and designers, Revit holds secrets – powerful, lesser-known features that can significantly streamline workflows. These features enhance productivity and unlock new levels of efficiency.
Think of Revit as a vast, feature-rich city. Most of us stick to the main roads, the well-trodden paths that get us where we need to go. But what if there were hidden alleyways, secret passages, and shortcuts that could make your journey smoother and faster?
This article is your map to some of these hidden gems. We’re about to embark on an exploration, delving into tools and techniques that you might have overlooked in your daily Revit endeavors.
1. Keyboard Shortcut Customization
One of the most immediate ways to boost your efficiency in any software is through keyboard shortcuts. Revit comes with a default set, but the real power lies in customization.
Why Customize Shortcuts? Tailoring shortcuts to your personal workflow means less time hunting for commands in the Ribbon. This translates to faster modeling, drafting, and overall project navigation.
Imagine accessing your most-used tools with a simple key press. That’s the efficiency we’re aiming for.
Accessing Keyboard Shortcut Customization
Getting to the customization dialog is straightforward. Follow these steps:
- Navigate to the File menu in the top-left corner of Revit.
- Click on Options at the bottom of the menu.
- In the Options dialog box, select the User Interface tab on the left.
- Here, you will find the Keyboard Shortcuts button; click Customize….
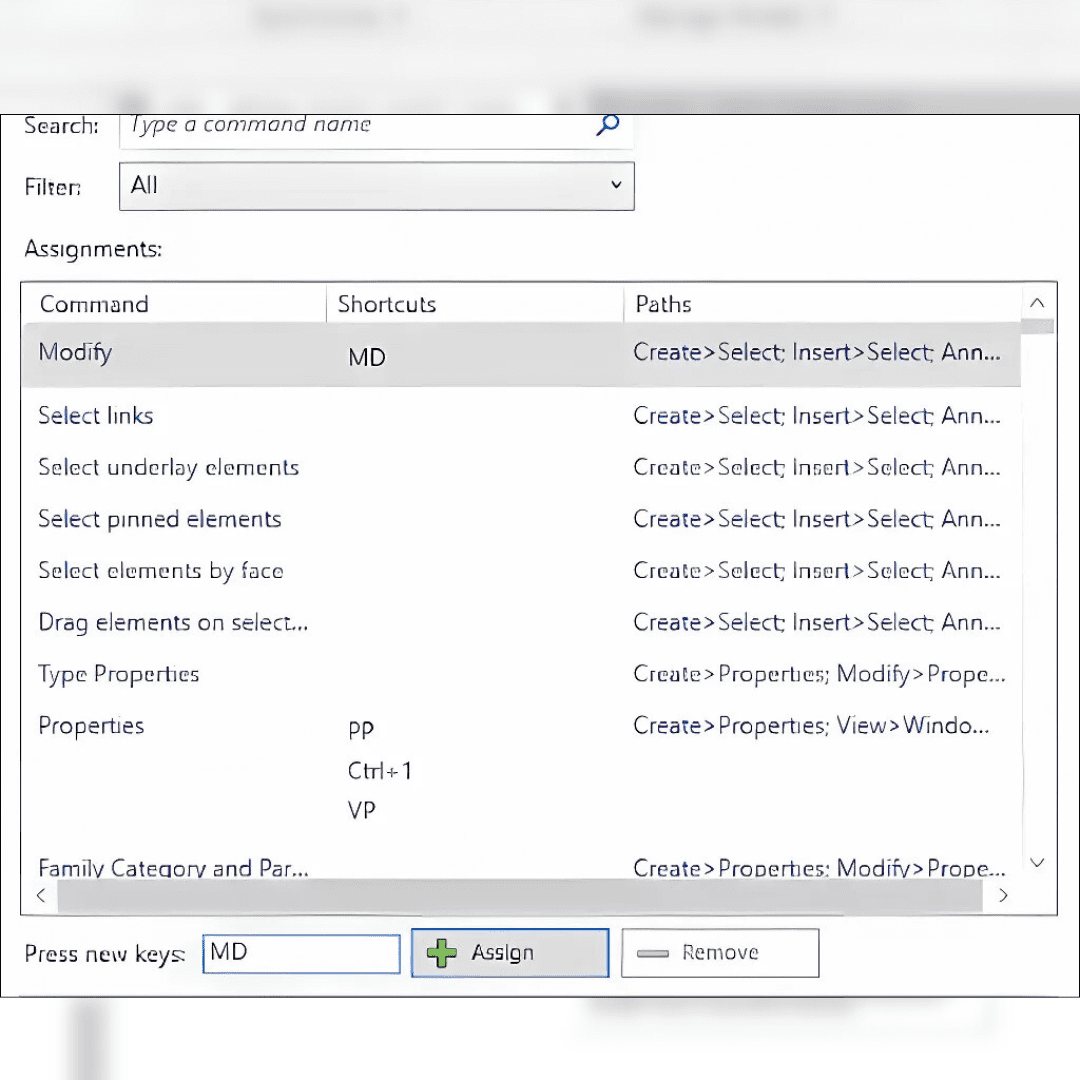
The Customization Interface
The Keyboard Shortcuts dialog box might seem daunting at first. However, it’s quite logically laid out.
- You’ll see a list of commands on the left, searchable by name.
- On the right, you can assign new shortcuts or view existing ones.
Finding Commands
Use the search bar at the top of the commands list. Type in the name of the command you wish to customize, like “Align” or “Dimension.” The list will filter as you type, making it easy to locate specific commands.
Assigning a New Shortcut
Once you’ve selected a command, focus on the “Press new keys” field. Simply press the key combination you want to assign (e.g., AA for Align, DD for Dimension). If the shortcut is already in use, Revit will tell you which command it’s assigned to. You can then decide whether to overwrite it or choose a different combination.
- Click the Assign button to confirm your new shortcut.
Best Practices for Custom Shortcuts
Consider these tips for effective shortcut management:
- Keep them simple and memorable; two-letter combinations are often easy to learn.
- Try to create a system, for example, all dimension-related tools could start with “D.”
- Don’t go overboard initially; start with your top 5-10 most frequently used commands.
- Export your customized shortcuts using the Export button. This is crucial for backup or transferring settings.
A Small Change, A Big Impact
Investing a little time in setting up your keyboard shortcuts will pay dividends in the long run. It’s a foundational hidden feature that, once utilized, will make you wonder how you ever worked without it.
Each customized keystroke is a step towards a more fluid and personalized Revit experience.
2. Project Browser Organization
The Revit Project Browser is your central command for navigating all elements within your project. As projects grow, this list of views, sheets, schedules, and families can become overwhelmingly long.
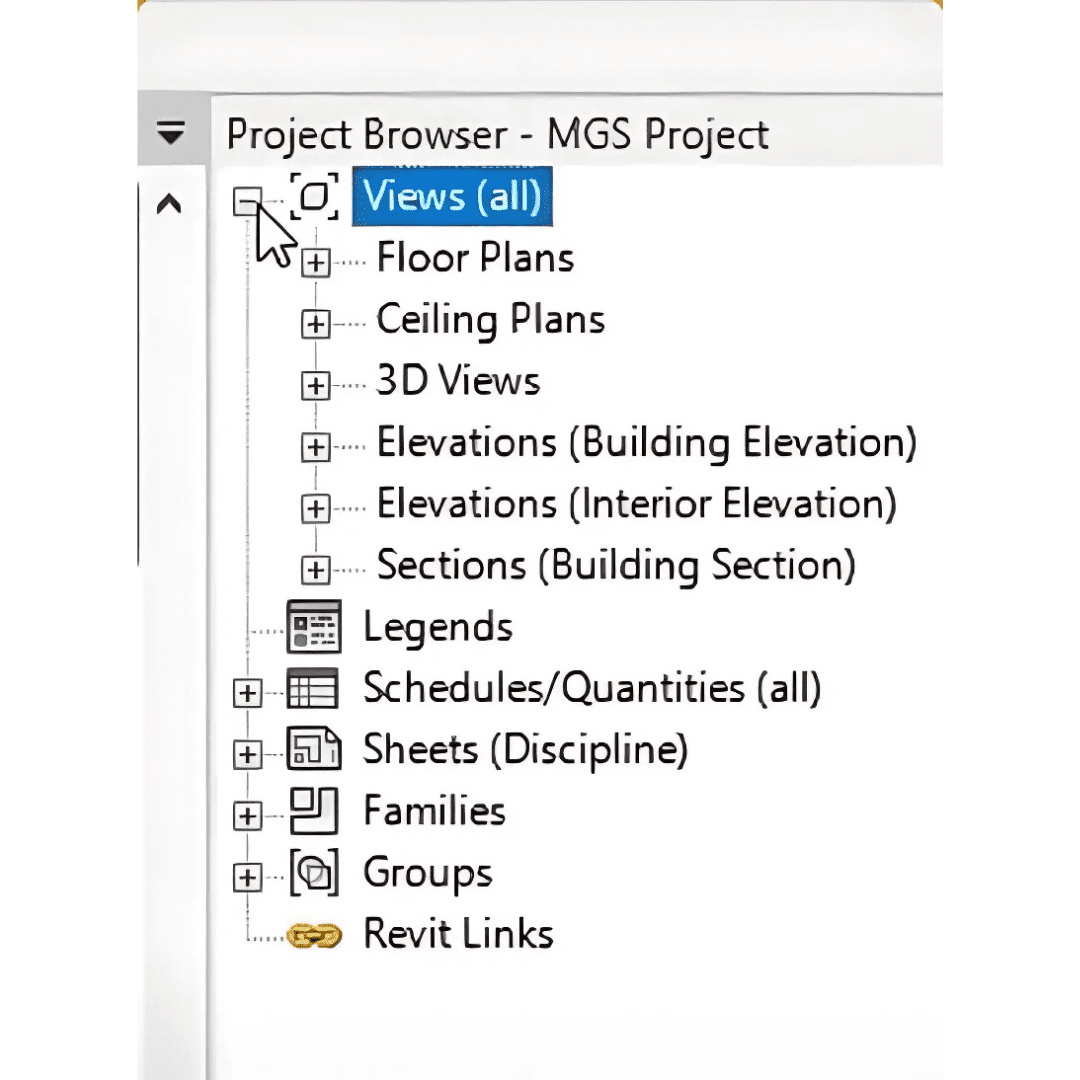
Understanding the Default Structure
By default, Revit organizes the Project Browser into several key categories.
- Views: Includes floor plans, ceiling plans, elevations, sections, 3D views, and schedules. Each view offers a unique perspective of your model or data.
- Sheets: Contains all drawing sheets where views and annotations are compiled for documentation. These are your final outputs.
- Schedules/Quantities: Lists all project schedules like door schedules or material takeoffs, vital for tracking data.
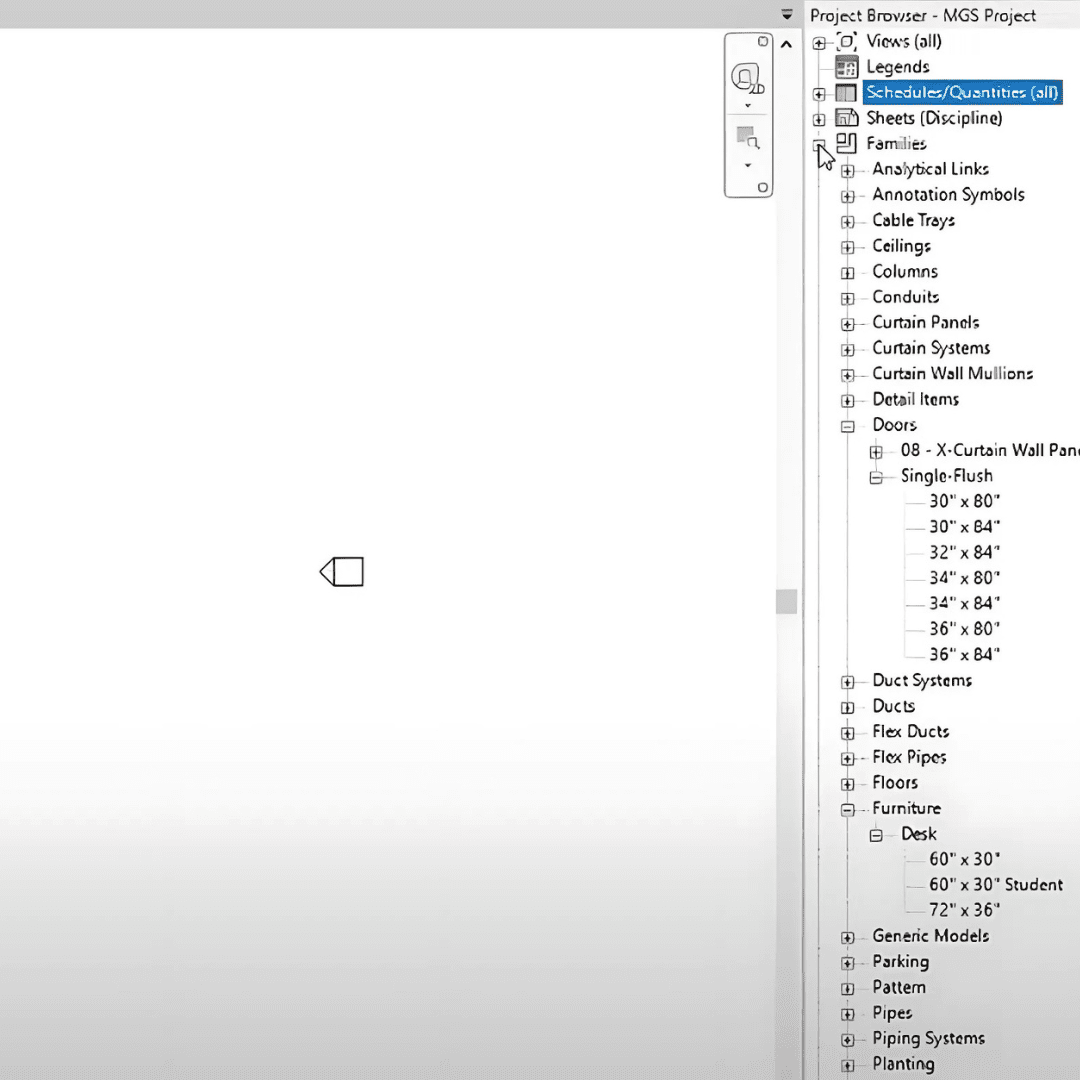
- Families: Houses all loaded families, including model, annotation, and system families – the fundamental building blocks.
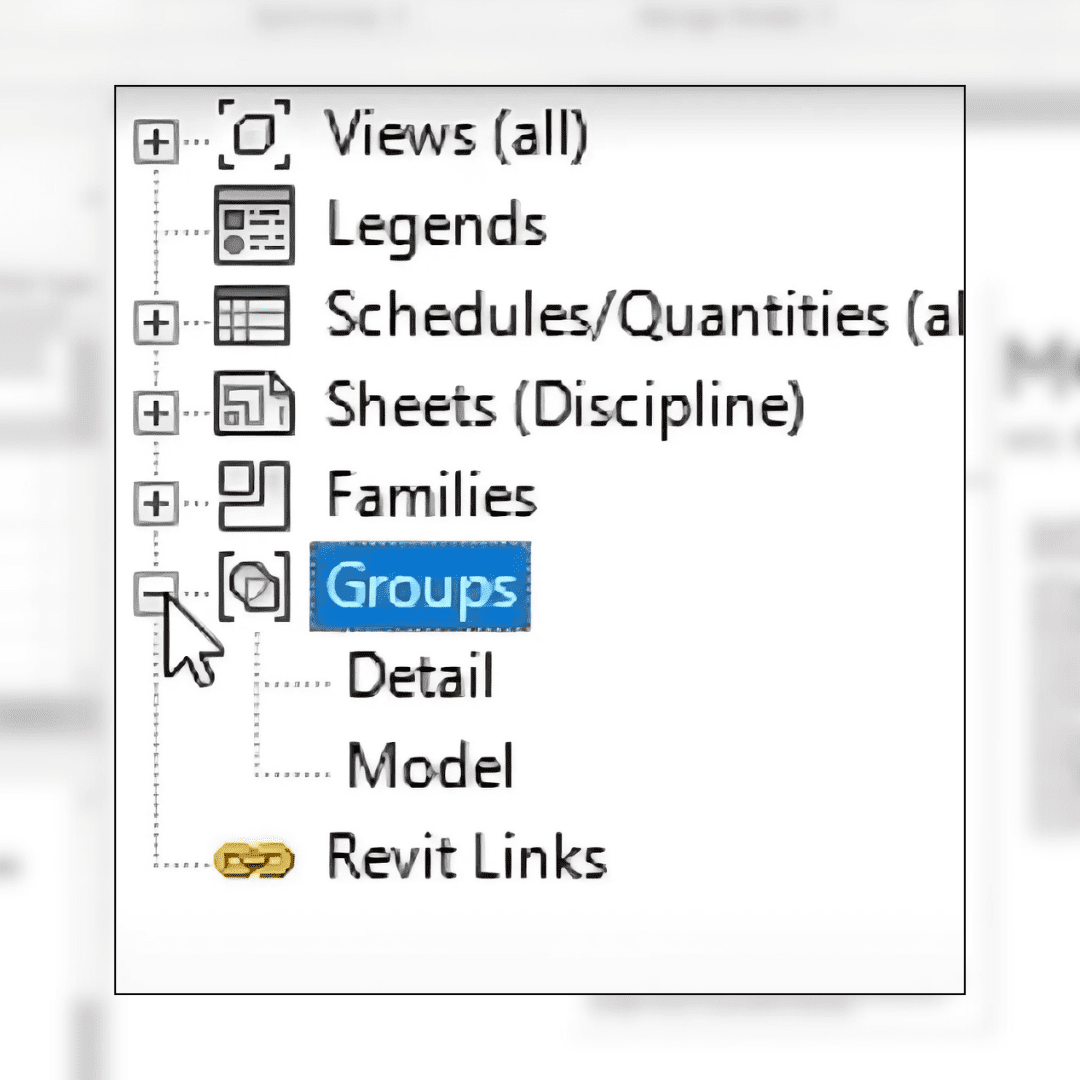
- Groups: Displays model and detail groups, which are collections treated as single units for repeating elements.
The Need for Customization
While Revit’s default organization is functional, complex projects often demand a more tailored approach. Customizing the Project Browser organization can make navigation significantly more intuitive and efficient.
This becomes especially true as your project scales in complexity. The number of views and sheets can multiply rapidly.
Accessing Project Browser Organization Settings
To begin customizing, right-click on “Views” or any top-level entry in the Project Browser. From the context menu, select Browser Organization….
The Browser Organization Dialog
This dialog box is your gateway to creating custom sorting and grouping schemes. You’ll see tabs for Views, Sheets, and Schedules. For each tab, you can create new organization schemes or modify existing ones.
Creating a New Organization Scheme for Views
Let’s focus on Views as an example. Click on the Views tab. Click the New button to create a new scheme. Give it a descriptive name, for instance, “By Discipline & View Type.”
Defining Filtering Rules
The Filtering tab allows you to include or exclude views based on specific parameters. For example, you could filter views to show only those whose “Discipline” parameter is “Architectural.”
Defining Grouping and Sorting Rules
This is where the magic happens. Go to the Grouping and Sorting tab. Here, you can group views by up to four levels of parameters. You can also specify ascending or descending sort order.
- For instance, group first by “Discipline.”
- Then, group by “Family and Type” (like “Floor Plan” or “Elevation”).
- Finally, group by “Phase.”
Experiment and Iterate
Don’t be afraid to experiment with different schemes. What works for one project might not be ideal for another. The beauty of this feature is its flexibility. You can create multiple schemes and switch between them.
Effective Project Browser organization is a hallmark of a well-managed Revit project. It transforms the browser into a powerful project management tool.
3. Selection Filters
Working in a dense Revit model often means needing to select specific elements amidst a crowd. Accidentally selecting the wrong things can lead to errors or wasted time; this is where Selection Filters shine.
Introduction to Selection Filters in Revit
The selection filter is a crucial tool for managing element selection. Whether for a small home or a sprawling complex, you’ll need to isolate specific elements without grabbing everything else.
Why Are Selection Filters So Important?
Selection filters allow you to refine your choices with precision.
- Work Efficiently: Narrowing your selection speeds up edits and modifications.
- Avoid Mistakes: Filters prevent accidental selection of unintended elements, especially during bulk changes.
- Enhance Control: They provide superior control over your model, simplifying management of large projects.
Understanding the Basics: How Selections Work
Before diving into filters, let’s quickly review selecting multiple elements:
- Click and Drag (Window Selection): Dragging left to right selects only elements entirely within the box.
- Click and Drag (Crossing Selection): Dragging right to left selects everything the box touches.
- Ctrl + Click: Hold Ctrl and click individual elements to add them to your selection.
- Shift + Click: Hold Shift and click selected elements to remove them from your selection.
Applying the Selection Filter: A Step-by-Step Guide
The process is quite intuitive.
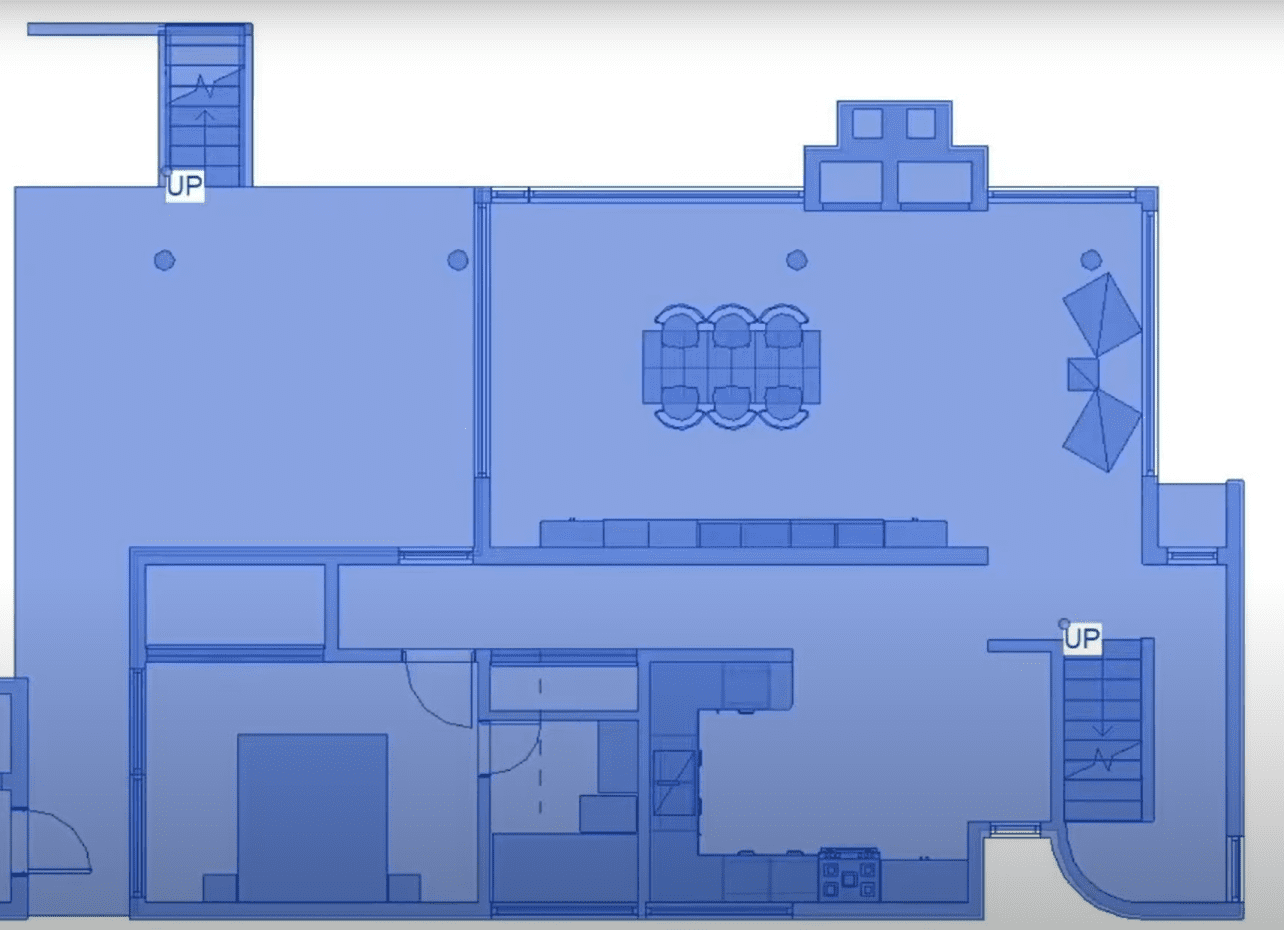
Step 1: Initial Selection:
- First, make a broad selection of elements in your model. This might include various types like walls, doors, and furniture.
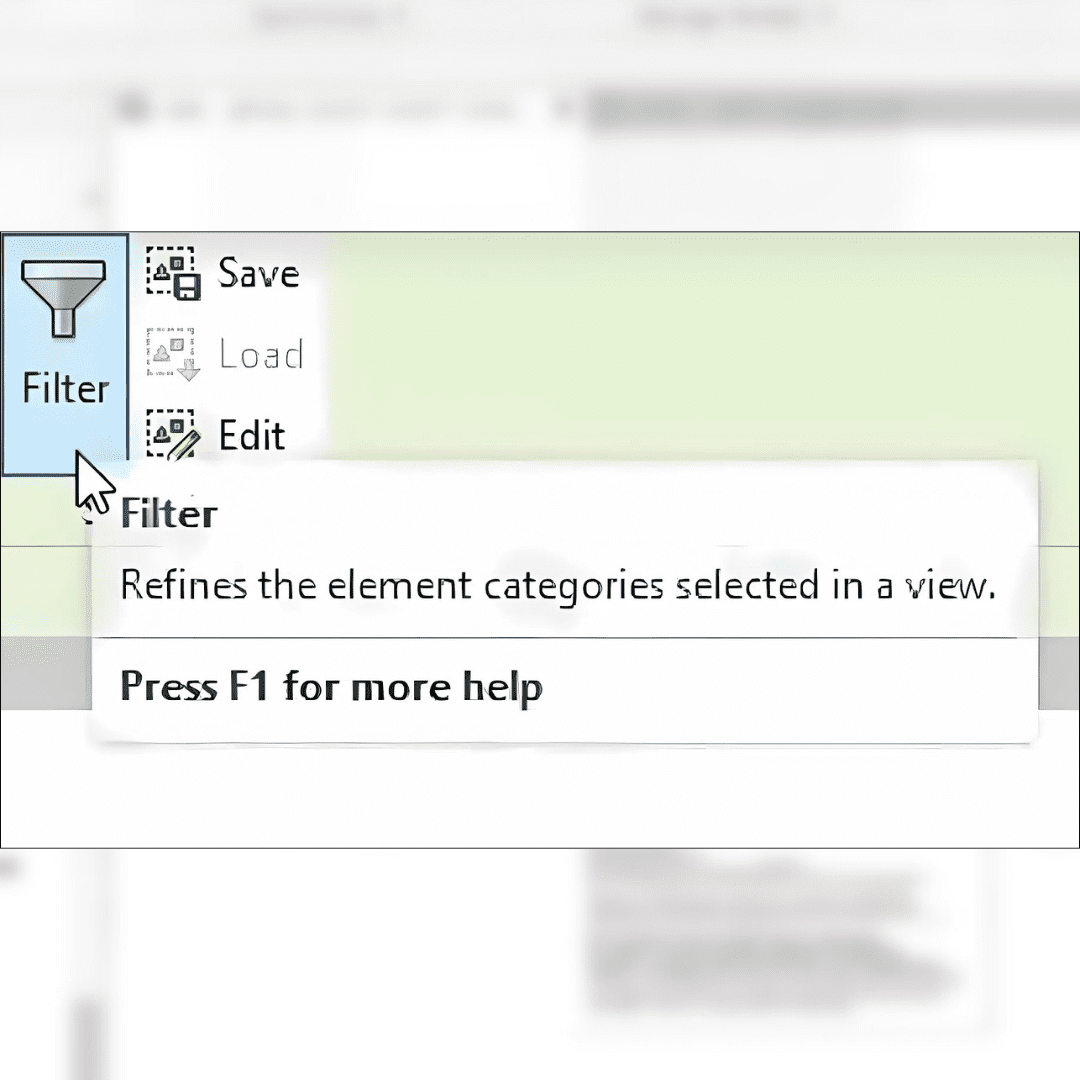
Step 2: Access the Selection Filter:
- Once selected, the Modify | Multi-Select tab appears on the Revit Ribbon.
- Look for the Filter button (often a funnel icon) in the Selection panel and click it.
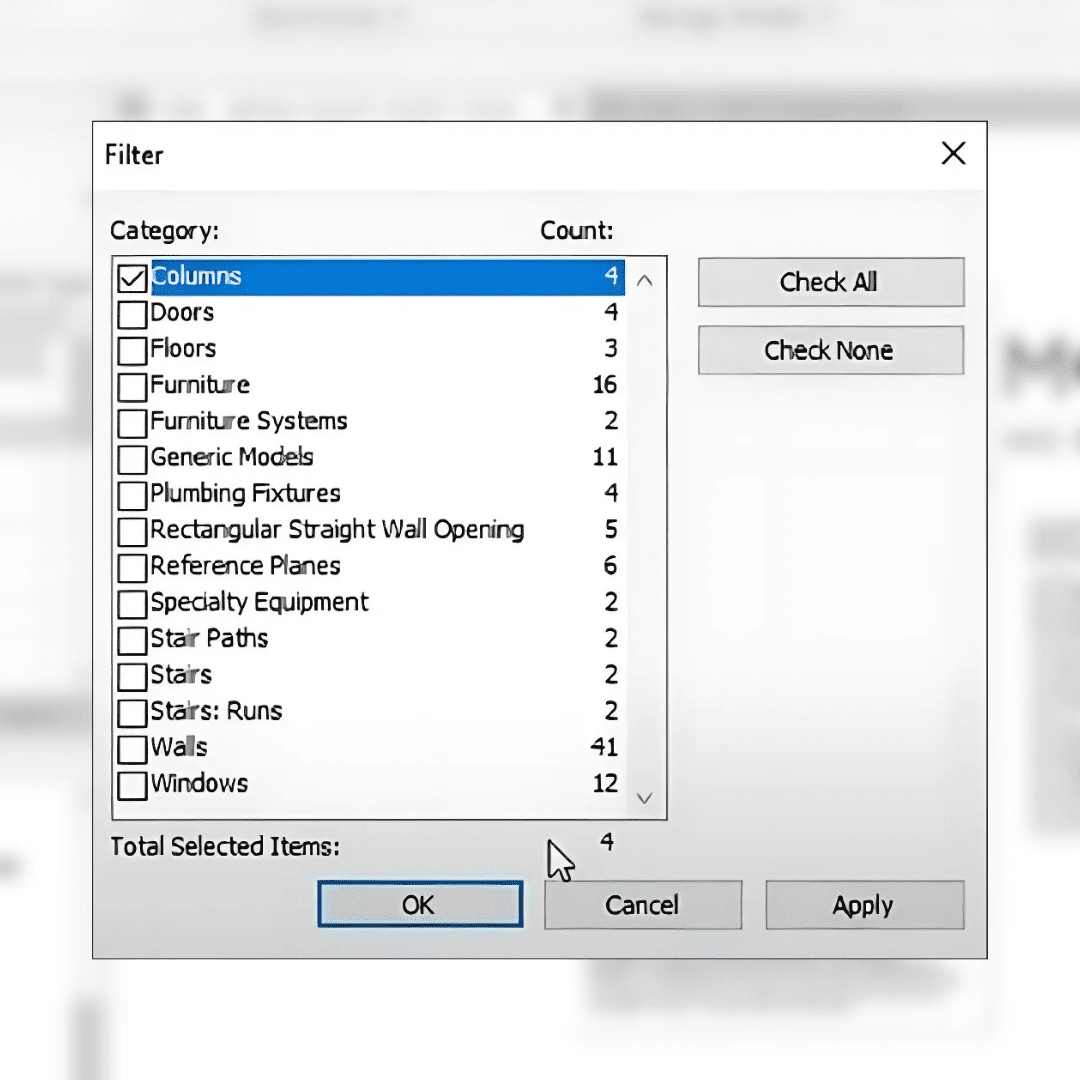
Step 3: Using the Filter Dialog Box:
- The Filter dialog box opens, listing all categories in your current selection.
- Each category has a checkbox; by default, all are checked.
- Uncheck categories you want to exclude. For instance, to keep only doors selected, uncheck everything except “Doors.”
- Use “Check None” to quickly deselect all, then pick what you need.
- Click OK to apply the filter. Your selection will update.
Step 4: Confirming Your Refined Selection:
- After applying, always verify. Visually inspect or check the Properties palette to see what’s selected.
Saving Selection Sets
While not part of the filter tool itself, once you have a desired selection, you can save it.
- With elements selected, go to the Manage tab > Selection panel > Save Selection.
- Name your set. You can reload it later using Load Selection, invaluable for recurring tasks.
Conclusion
The features we’ve explored – Keyboard Shortcut Customization, Project Browser Organization, and Selection Filters – glimpse Revit’s extensive capabilities. Each offers a pathway to greater efficiency, control, and precision.
The journey of mastering Revit is ongoing. It’s a tool that rewards curiosity and continuous learning. By delving into these lesser-known functionalities, you refine your craft and elevate your ability to deliver exceptional projects.
So, keep exploring, keep experimenting. Watch as these “hidden” features become indispensable parts of your daily Revit workflow. And, if you need a helpful visual on these steps, check out our video on Revit’s hidden features on our YouTube Channel.
Your productivity, and perhaps your sanity on complex projects, will thank you.
Enjoyed this post?
Explore more resources here or book a quick call to learn how MGS Global Group can support your drafting and construction documentation needs.