Beginner’s Guide to Revit 2025
- 6-8 min read
- June 10, 2025
As a powerful architectural platform, Autodesk Revit is central to Building Information Modeling (BIM), offering a comprehensive suite of tools for professionals across the Architecture, Engineering, and Construction (AEC) sectors.
It is a complete toolkit almost — one that helps professionals design, document, and manage building projects from the first idea to the last detail.
However, if you’re new to Revit, its wide array of features might feel like stepping into a complex cockpit full of controls.
Before diving into more complex tasks, it’s crucial to get comfortable with the main controls – the basic tools for getting around. This guide is here to clearly explain these navigation controls.
The goal is to help you build a strong foundation, so you can move around Revit confidently and be ready to explore its more advanced features.
The Revit Home Screen – Your Launchpad
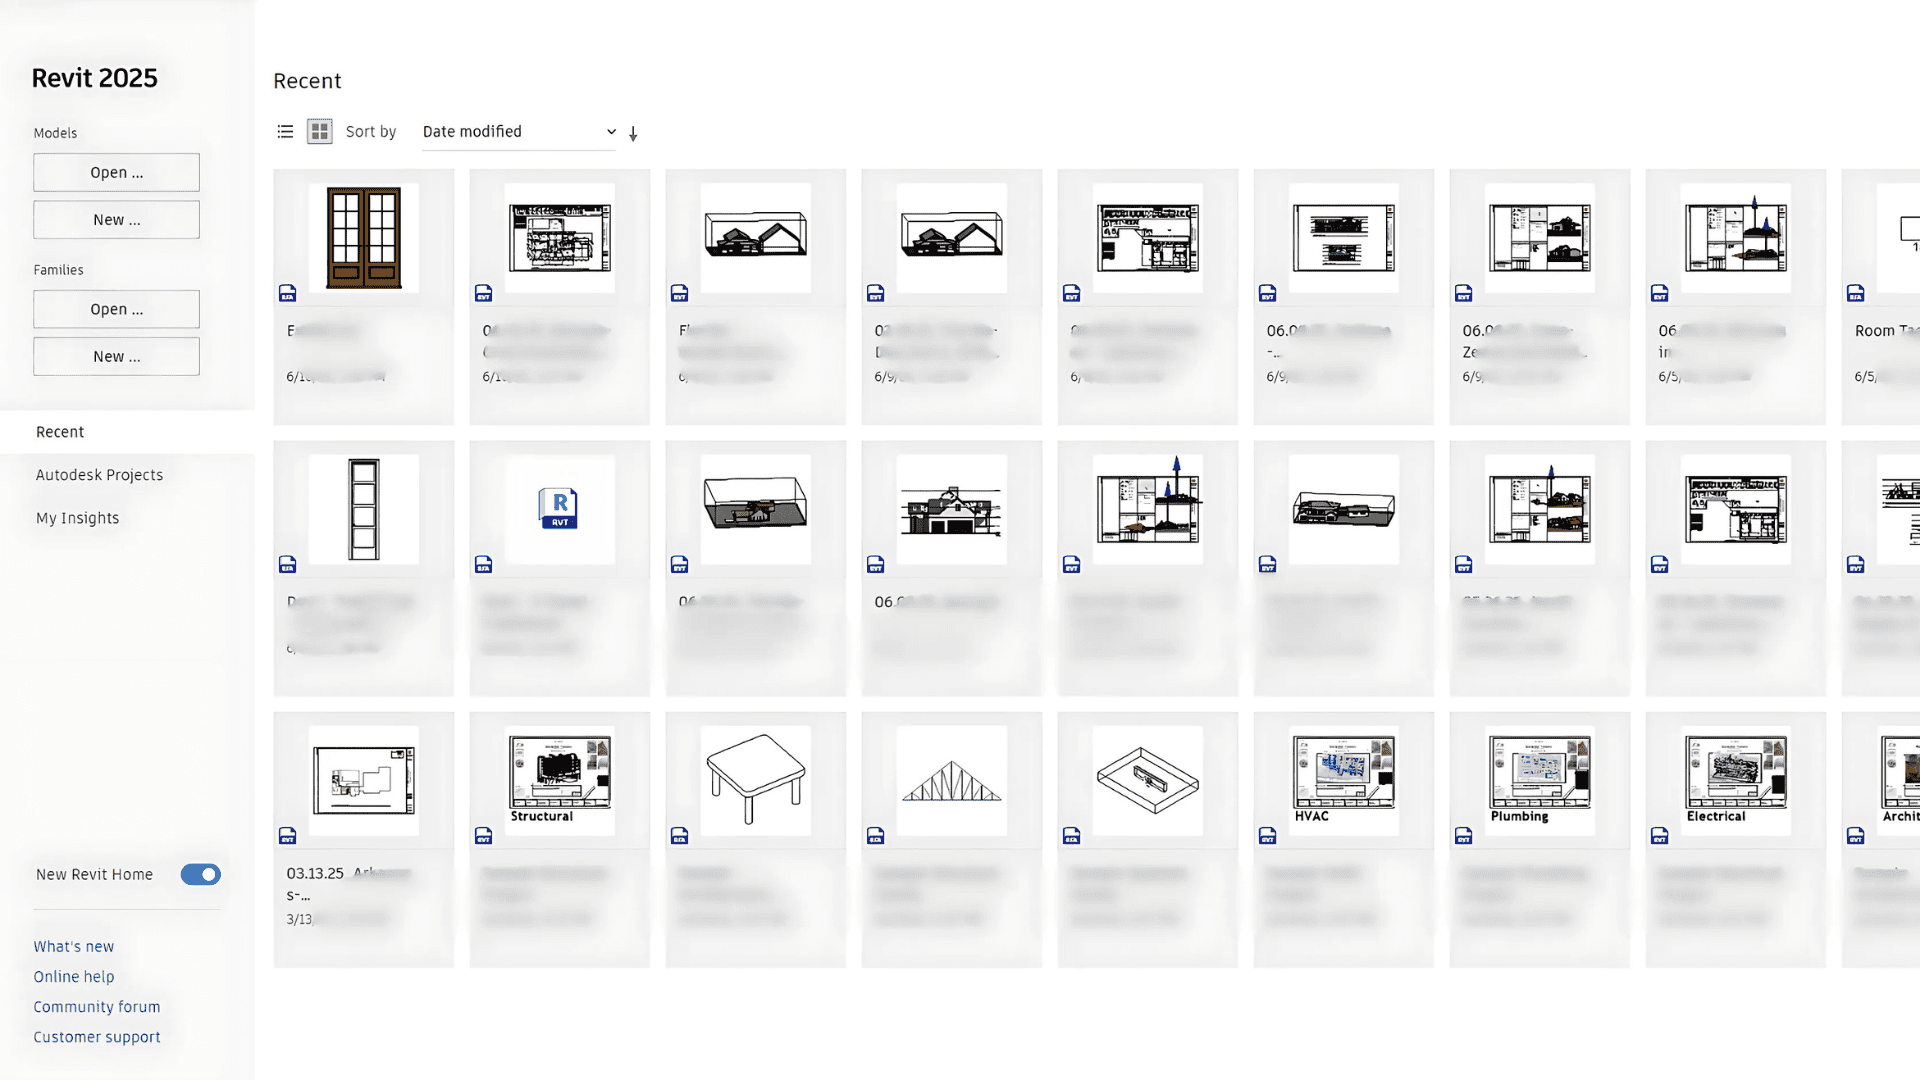
When you first open Autodesk Revit, you’ll land on the Home Screen. Think of this as your central hub for all your modeling work. It’s neatly organized into three main areas:
-
Projects: See your recent Revit files at a glance with visual thumbnails for quick access.
-
Families: These are the ready-to-use building blocks for your models, like doors, windows, and furniture.
-
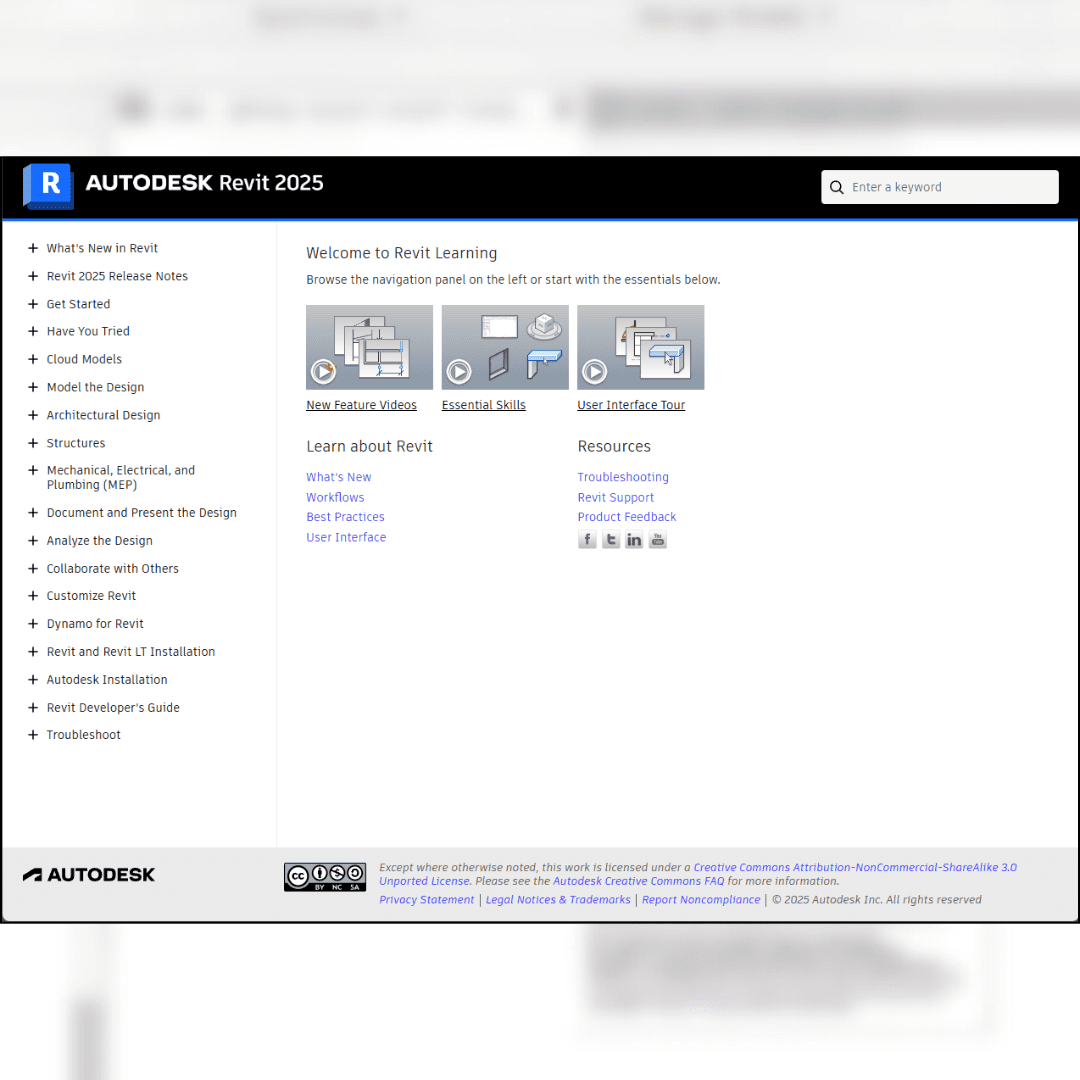
Resources: Find basic training materials and help documents directly from Autodesk here.
A critical tip for working with Projects: Never open a centralized project model directly from this Home Screen. Doing so can cause serious problems in collaborative projects, including data corruption. We’ll cover the correct way to open central files shortly. Understanding this is key for smooth project workflows.
Regarding Families, we’ll explore later how to load more or change existing ones. You can even learn to create your own from scratch! While the Resources tab offers general Autodesk training, our focus here is on practical tools for daily use, especially when using resources like the MGS template. Autodesk’s official resources are always a great backup for broader topics.
Launching Your Vision: Starting a New Project with Purpose
Ready to bring your design ideas to life? Starting a new project is where the magic begins.
-
Click “New”: You’ll find this button under the “Projects” section on the Home Screen.
-
Select a Template: Revit will ask you to choose a template file (.rte). Templates provide a crucial starting point with predefined settings, views, and content.
-
Revit includes standard options like Architectural, Structural, or Mechanical.
-
For many tutorials, a custom template (e.g., the MGS Schlachter version using US Imperial units) might be selected.
-
-
Initial Setup (with a custom template):
-
A unique splash screen (like one from the MGS Schlachter template) might appear, offering initial guidance.
-
From here, input essential project information:
-
Project Name (e.g., “Sample Project One by MGS”)
-
Client/Owner
-
Project Address
-
-
A fantastic feature of well-structured templates is that these details automatically populate title blocks across all project sheets, saving you a ton of data entry later!
-
Mastering the Project Browser
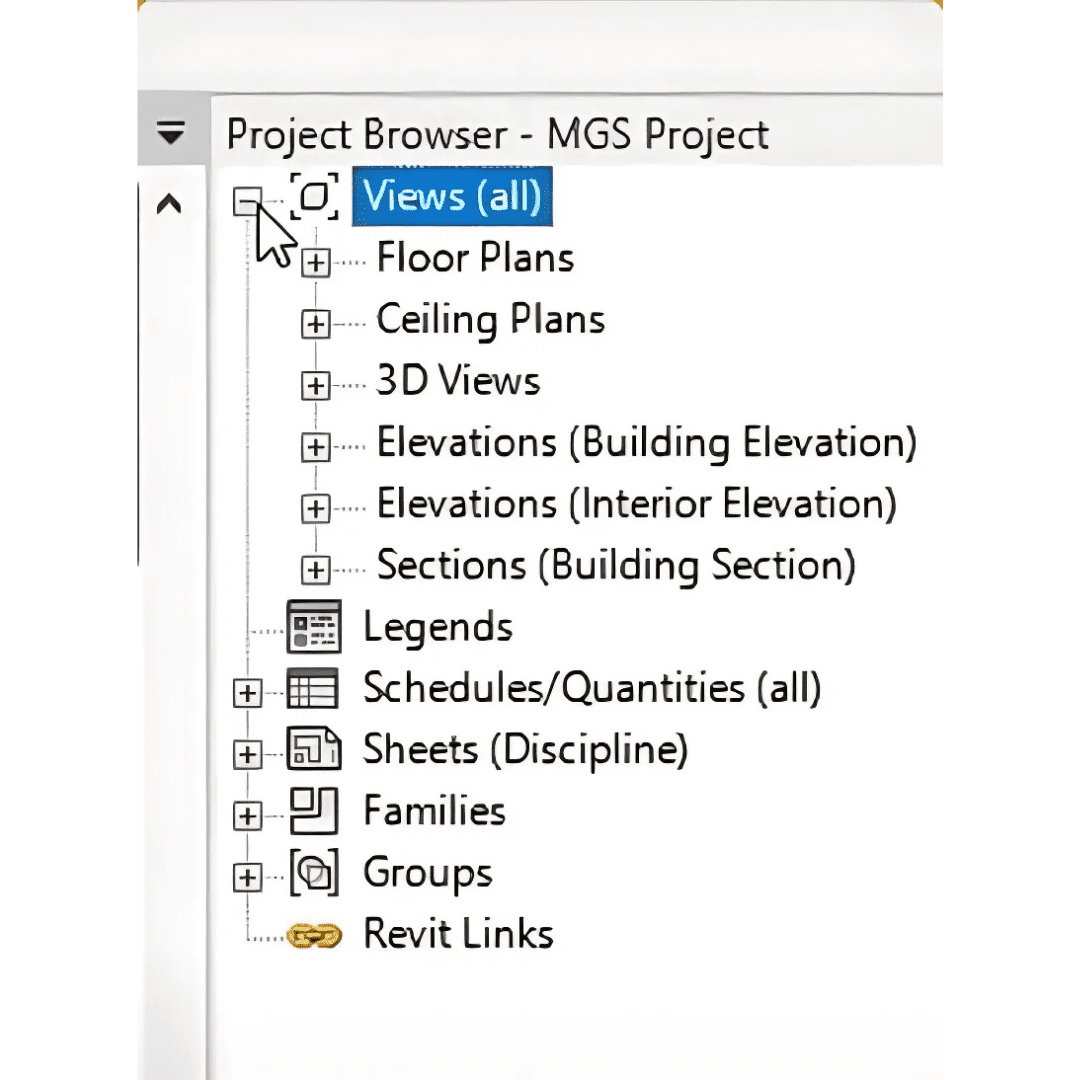
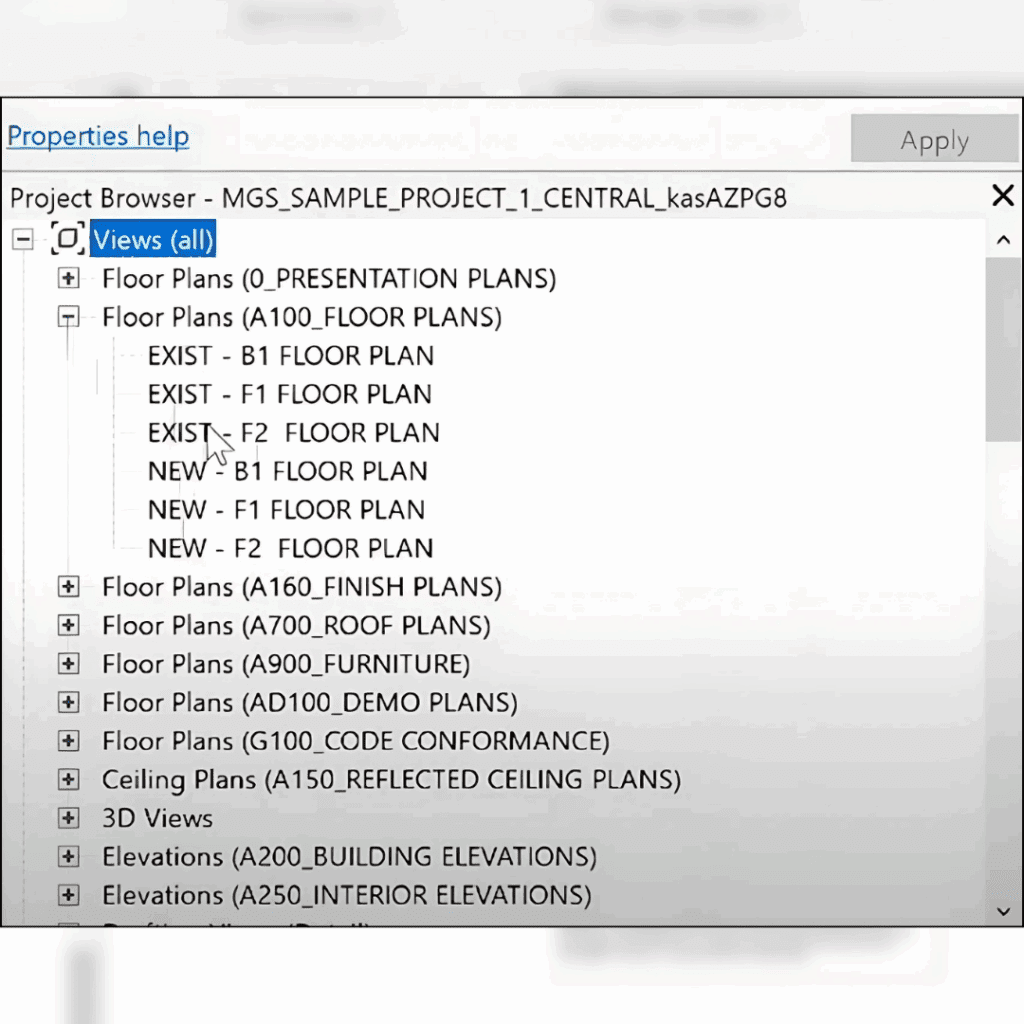
Next up is getting familiar with the Project Browser – one of the most vital parts of the Revit interface. It’s your main navigation hub, organizing every single component of your project in an easy-to-follow tree structure.
This includes all project elements such as:
-
Floor Plans
-
3D Views
-
Elevation and Section Views
-
Detail Views
-
Schedules and Legends
-
Sheets
-
Families and Groups
For instance, a common action is opening the First-Floor Plan, typically found under the “Views” category. If a title block is visible, you’ll likely see the project details you entered earlier already filled in, ensuring consistency and saving time.
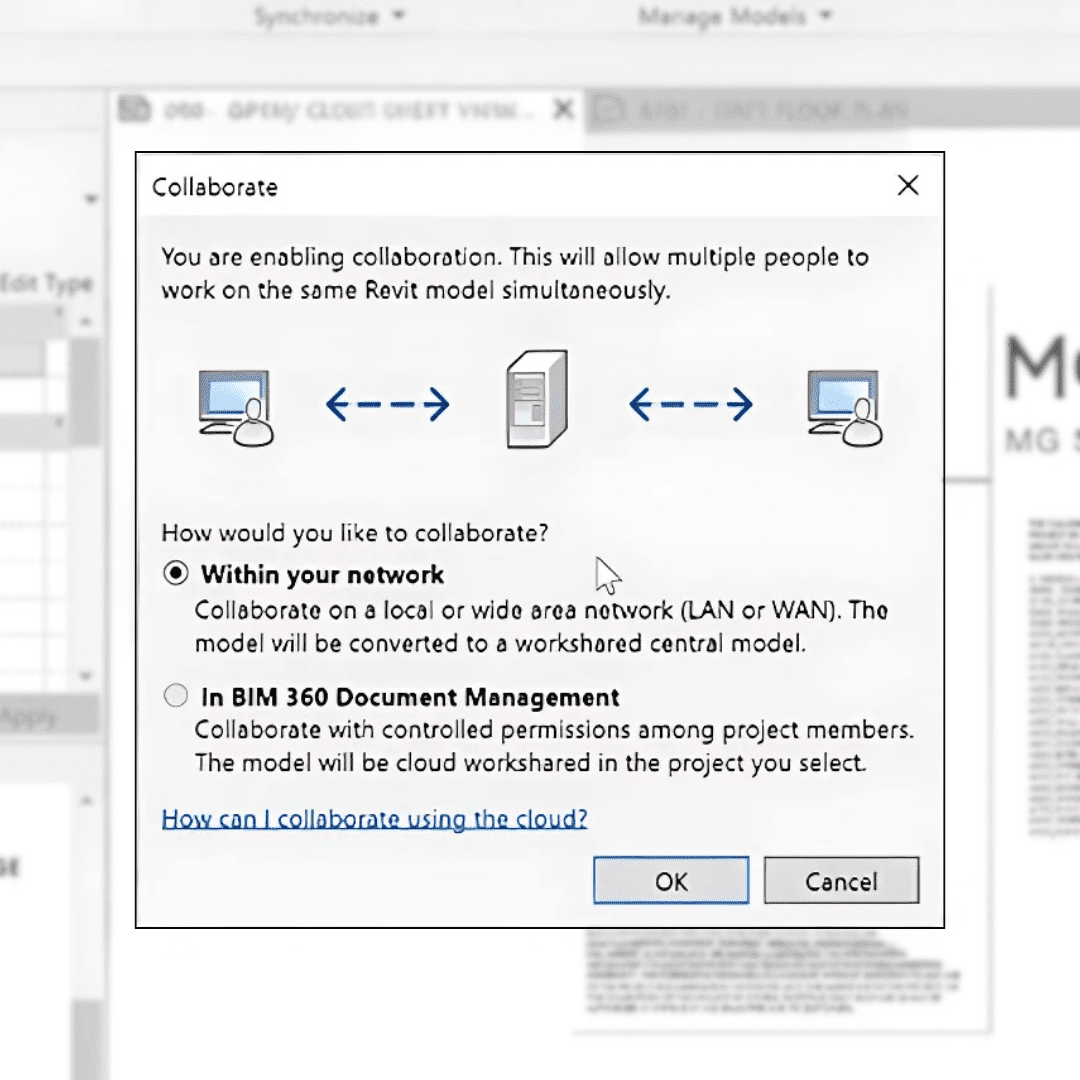
Setting Up a Central File for Teamwork
Setting up a model as a Central File is crucial for teamwork and robust project management in Revit.
-
What is a Central File? It’s the master copy of your Revit project, usually stored on a shared network. It allows multiple team members to work on the same project at the same time in a coordinated way. The system also includes automatic backups and tracks project history, protecting your work.
-
Why it’s valuable (even for solo users): Learning to set up and use a Central File is an excellent skill. It prepares you for collaborative projects and makes you a more versatile user.
Here’s how to establish a Central File:
-
Save your current project file before you begin.
-
When saving, it’s good practice to add the suffix “Central” to the file name (e.g., “MGS_SampleProjectOne_Central.rvt”) for easy identification.
-
Enable collaboration: Click the Collaborate button on the Collaborate tab in the Revit ribbon.
-
Revit will then ask how you want to collaborate.
-
Choose “Collaborate within your network” for local office setups.
-
Alternatively, for remote or distributed teams, you can explore cloud options like Autodesk BIM 360/Construction Cloud.
-
-
Once you’ve made your selections and confirmed, save the file again.
-
This final save officially turns your project into a Central File, ready for team access.
From this point on, each team member will create and open a new “local copy” of this Central File to do their work. This ensures individual changes are made in separate copies, which are then synchronized with the Central File.
Understanding the Role of Worksets
Once you’ve set up Central Files, Worksets come into play. They are automatically activated when collaboration is enabled.
-
What are Worksets? Think of them as distinct, manageable layers or logical categories within your model. They’re similar to layers in other CAD software but have added intelligence for team collaboration.
-
How they help: Worksets allow different team members to “own” or focus on specific parts of the project (e.g., one person on the structural grid, another on interior walls).
Every Revit project starts with some predefined Worksets, like “Shared Levels and Grids” and a generic “Workset1.” Customizing these and creating your own user-defined Worksets are topics for more advanced guides. Effective workset management is absolutely key to a smooth multi-user experience.
Accessing Your Project: The Correct Way to Open a Local File
When starting your work on a collaborative Revit project each day, follow this specific method:
-
Always create a new local file directly from the Central File. This is critically different from simply re-opening a previous local copy from your hard drive.
This action:
-
Copies the latest version of the Central File from its shared location to your local machine.
-
Maintains a live link to that Central File. This ensures your changes can be accurately synchronized back to the Central File, and you can receive the latest updates from other team members.
Important: Avoid choosing to “detach from central” when opening a file unless you have a very specific, well-understood reason.
-
When is “detach” okay? For sharing a standalone model with external consultants not part of the live workflow, or for archival purposes.
-
Why be cautious? Detaching permanently breaks the link to the Central File for that particular copy.
Exploring the Project Browser Further
Here are a few more handy tips for navigating the versatile Project Browser:
-
View Categories: Under sections like “Floor Plans,” you might find sub-categories. Common examples include:
-
“Existing” and “New” plans for renovation projects.
-
Phased construction identifiers like “Phase 1” or “Demolition.” These help manage projects by controlling element visibility based on their status or construction sequence.
-
-
Naming Conventions: Views in the Project Browser are often arranged and named according to established standard codes. Some firms also implement their own specific naming conventions for views and sheets. This structured approach promotes consistency.
-
Template Variation: Remember, the Project Browser’s organization and appearance can (and often do) vary. Different firms may extensively customize their Revit templates, tailoring the Project Browser to match their unique workflows and project delivery standards.
Conclusion
Think of understanding the Home Screen, navigating the Project Browser, and setting up a Central File as your essential first steps into Revit’s powerful world. These initial skills are your launchpad, building a strong foundation for tackling more complex project workflows with confidence.
Once these basic navigational principles become familiar, you’ll be better equipped to handle intricate designs and collaborate effectively with your team.
And if you need to delve even deeper into the nitty-gritty, you can always view our Revit basics tutorial in our YouTube Channel.
Enjoyed this post?
Explore more resources here or book a quick call to learn how MGS Global Group can support your drafting and construction documentation needs.